8x8 dot matrix(MAX7219)

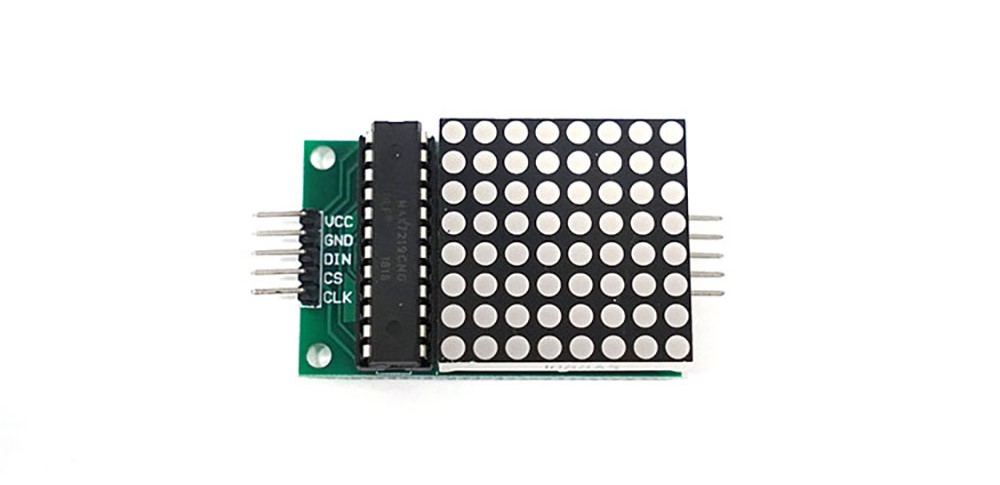
This is a component composed of an 8x8 grid of LEDs.
It utilizes the MAX7219, allowing control with just 3 pins besides the power pin.
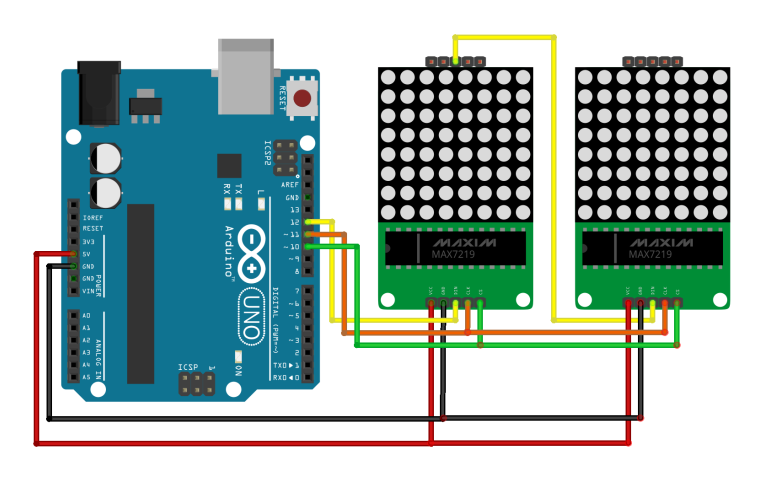
Multiple dot matrix modules can be daisy-chained together.
Specifications
- Operating Voltage: 5V
- Operating Current: 320mA ~ 2A
Required Hardware
- Dot Matrix Module
- Arduino
Connections
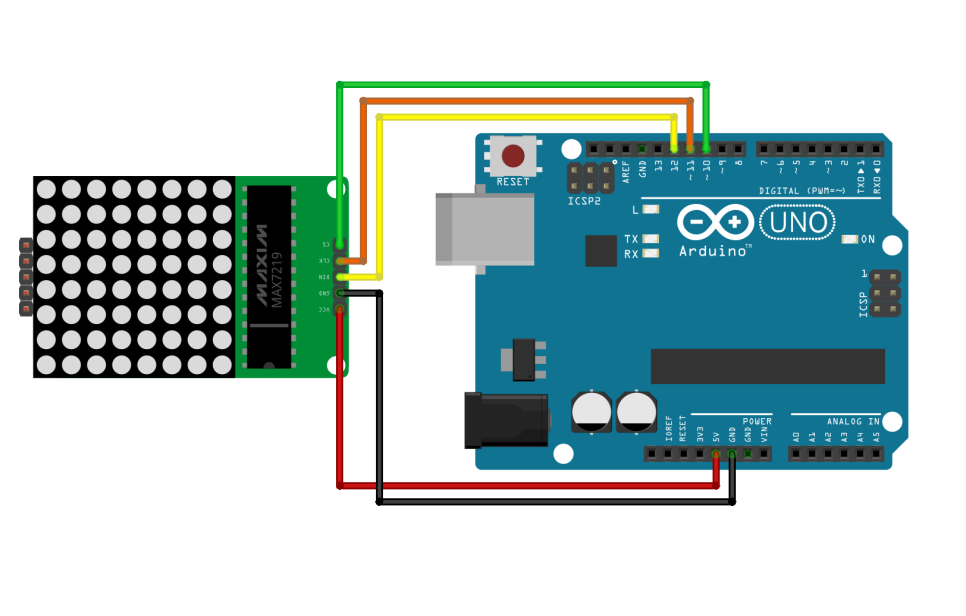
- Connections required to run the example code
| Dot matrix | Arduino |
| VCC | 5V |
| GND | GND |
| DIN | D12 |
| CS | D11 |
| CLK | D10 |

- Connecting more than one dot matrix
| Left Dot Matrix | Right Dot Matrix |
| VCC | VCC |
| GND | GND |
| DOUT | DIN |
| CLK | CLK |
| CS | CS |

Library
- LedControl
- Arduino Libraries
Example Code
#include "LedControl.h" // Library call for using the dot matrix

#define dataIn 12   // Use pin 12 for DIN
#define cs 11       // Use pin 11 for CS
#define clk 10      // Use pin 10 for CLK

LedControl lc = LedControl(dataIn, clk, cs, 1); // LedControl('DIN pin number', 'CLK pin number', 'CS pin number', 'number of dot matrices')

void setup() {
  lc.shutdown(0, false);    // Code to wake up the dot matrix. shutdown('address of the dot matrix to specify', 'false: wake up')
  lc.setIntensity(0, 8);    // Set brightness. setIntensity('address of the dot matrix to specify','brightness value (0~15)')
  lc.clearDisplay(0);       // Initialization before use. clearDisplay('address of the dot matrix to specify')
}

void loop() // Blink the dot matrix for 1 second.
{
  // Turn on the LEDs of the dot matrix.
  for (int row = 0; row < 8; row++)
  {
    for (int col = 0; col < 8; col++)
    {
      lc.setLed(0, col, row, true);
    }
  }
  delay(1000);
  // Turn off the LEDs of the dot matrix.
  for (int row = 0; row < 8; row++)
  {
    for (int col = 0; col < 8; col++)
    {
      lc.setLed(0, col, row, false);
    }
  }
  delay(1000);
}