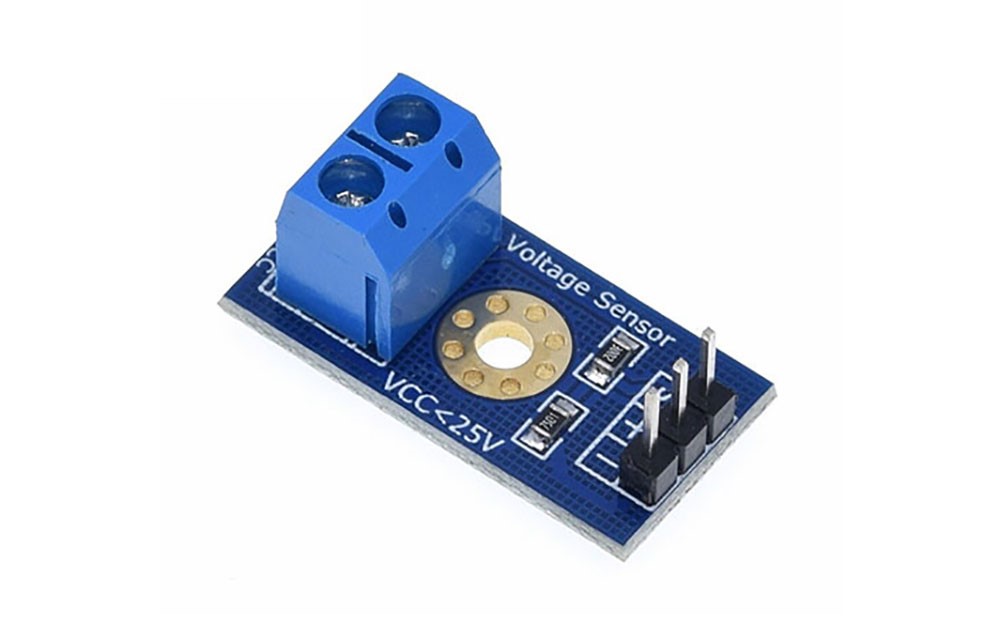
Voltage Measurement Sensor(HAM6827)

The HAM6827 is a miniature module capable of measuring voltages up to 25V. Its small size makes it suitable for development of compact products. When used with an Arduino, it requires some calculations to convert the analog pin readings to voltage values.
Specifications
- Input Voltage Range: DC 0V ~ 25V
- Voltage Measurement Range: 0.02445V ~ 25V
- Voltage Resolution: 0.00489V
Example Required Hardware
- Arduino board
- Jumper cables
- Voltage Measurement Sensor
- 9V Battery
Connection
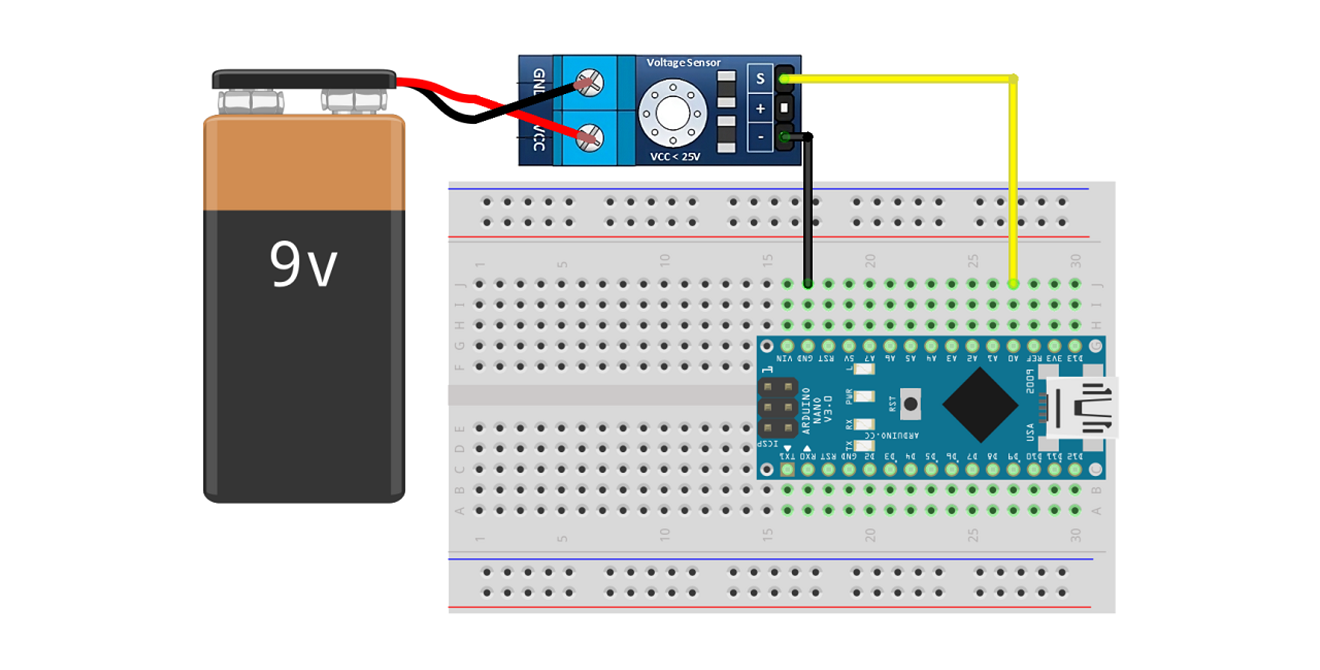
- Measuring a 9V Battery
| Arduino | Voltage Measurement Sensor | 9V Battery |
| A0 | S | |
| GND | - | |
| VCC | + | |
| GND | - |

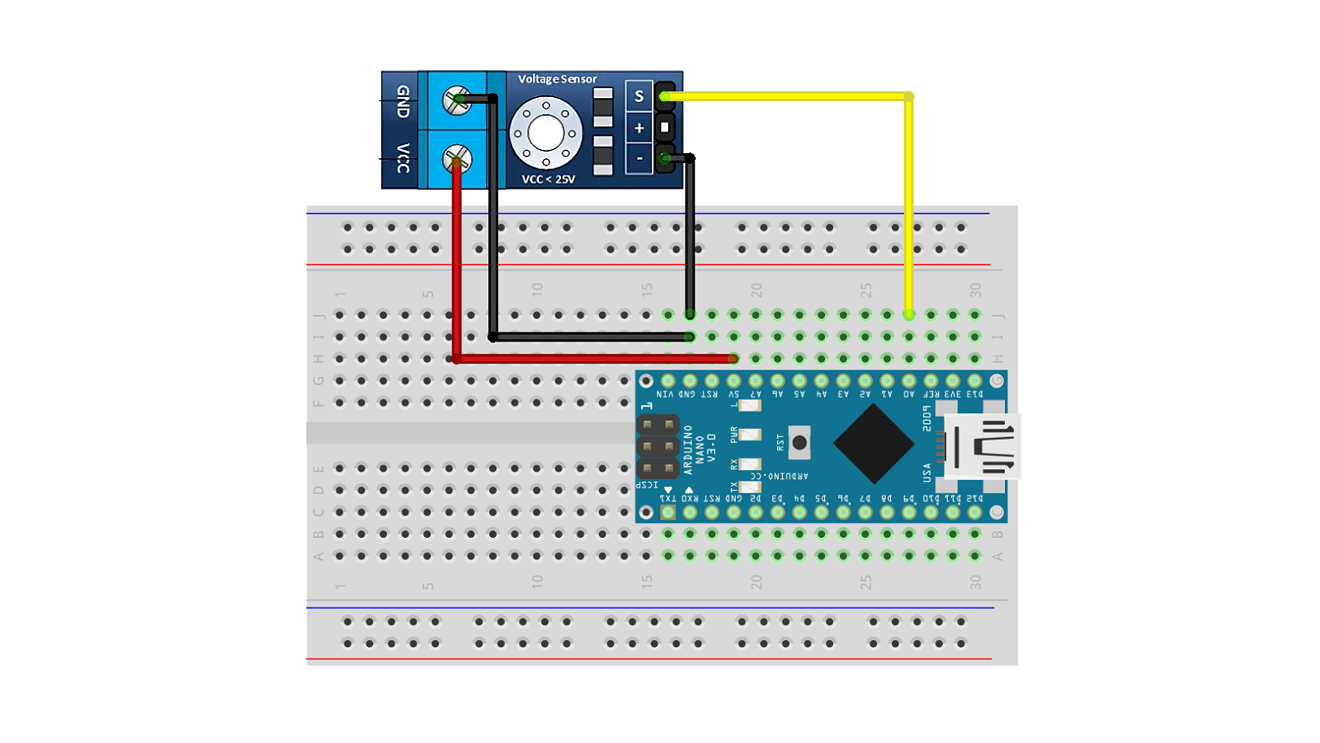
- Measuring a 5V Battery
| Arduino | Voltage Measurement Sensor |
| 5V | VCC |
| GND | -, GND |
| A0 | S |

Example Code
The example code measures the value from the voltage measurement sensor and applies it to a formula to output the actual voltage value. The formula converts the analog reading into a voltage by accounting for the internal resistances in the voltage measurement circuit.
double R1 = 30000.0;  // Internal resistance 1 of the voltage measurement sensor
double R2 = 7500.0;   // Internal resistance 2 of the voltage measurement sensor
double val = 0;
double vout = 0;

void setup() {
  Serial.begin(9600);
  Serial.println("Start");
}

void loop() {
  val = analogRead(A0);
  vout = ((val * 5.0) / 1023.0) / (R2 / (R1 + R2));  // Part that converts to voltage
  Serial.println(vout);
  delay(300);
}
Execution Results
- 9v

- 5v
