Using Arduino
Arduino can be used in various ways. Here's an introduction to some of them
Arduino IDE
Arduino Integrated Development Environment (IDE) is a software environment for programming Arduino microcontrollers.
Arduino is an open-source hardware platform used to create and program simple computing devices for a variety of projects.
It is based on C++.
Installation
1. Visit the Arduino website.
2. Click on the Software tab.

3. Download the desired version
- With the release of Arduino IDE 2.0 in 2021, both the existing 1.x version and the new 2.x version are available for download.
- While the 2.x version offers additional convenience features, those who are familiar with the 1.x version or wish to follow existing books or reference materials can continue using the 1.x version.
- Download the installation file for your operating system and run it to install.

Usage
1. Launch the installed Arduino IDE.
2. Connect the Arduino board to your computer (or laptop).
3. If you're using a compatible board instead of an official Arduino board, you may need to install drivers separately. Driver installation guide
4. Set the Arduino board and port in the Arduino IDE.

- Select the board type according to the Arduino board you're currently using.
- If you're unsure about the port number, you can check it in the Device Manager.

5. Test Arduino usage
- Load the basic Blink example in the Arduino IDE. The Blink example code makes the LED connected to pin 13 of the Arduino blink on and off every 1 second.
- Press the upload button and verify that the LED connected to pin 13 of the Arduino is blinking correctly.

Execution Result
The LED connected to pin 13 of the Arduino blinks on and off every 1 second.

Python
Python is a programming language widely used in various domains such as application development, web development, data analysis, artificial intelligence, and machine learning.
It features concise and readable syntax, making it a popular choice for beginners in coding.
Installation
1. Visit the Python website.
2. Click on the Downloads tab and download the Python installer for your operating system.
- Note: When using the latest version of Python, there may be compatibility issues with Firmata. In this text, Python version 3.7, which is the recommended version, is used.
- The specific version mentioned in the red box is the one used in this text and may vary depending on your operating system and environment.

3. During installation, make sure to check the box Add Python 3.x to PATH. If not checked, the environment variables will not be set, and you'll need to manually specify the path to the Python executable when using the python command in the command prompt or terminal.

Using pyserial
pyserial is a Python library for serial communication, allowing you to open serial ports and send/receive data.
1. Open a command prompt window by pressing Win + R and typing cmd.
2. Install the 'pyserial' library by typing pip install pyserial.

3. Open IDLE (Python) and create a new file by clicking File - New File.

4. Test with the example code for blinking an LED connected to pin 13.
- Upload the following code to Arduino
int ledPin = 13;

void setup() {
  pinMode(ledPin, OUTPUT);
  Serial.begin(9600);
}

void loop() {
  if (Serial.available() > 0) {
    char command = Serial.read();
    if (command == '1') {
      digitalWrite(ledPin, HIGH); // Turn LED on
    } else if (command == '0') {
      digitalWrite(ledPin, LOW);  // Turn LED off
    }
  }
}
- Write the following code in the Python IDLE script opened in step 3 and press F5 to run it
import serial
import time

# Set the serial port (can be found in the Arduino IDE)
serial_port = 'COM4'

# Open the serial port
ser = serial.Serial(serial_port, 9600, timeout=1)

try:
    while True:
        # Send '1' to turn on the LED
        ser.write(b'1')
        print("LED ON")
        time.sleep(1)

        # Send '0' to turn off the LED
        ser.write(b'0')
        print("LED OFF")
        time.sleep(1)

except KeyboardInterrupt:
    # Close the serial port when the program exits
    ser.close()
Execution Result
The LED connected to pin 13 of the Arduino blinks on and off every 1 second.
Using Firmata
Firmata is a protocol and library for convenient communication between Arduino and computers. By uploading Firmata to an Arduino board, you can easily control digital and analog pins of the Arduino from Python or other environments.
1. Open a command prompt window by pressing Win + R and typing cmd.
2. Install the 'pyfirmata' library by typing pip install pyfirmata.

3. Open IDLE (Python) and create a new file by clicking File - New File.
4. Test with the example code for blinking an LED connected to pin 13.
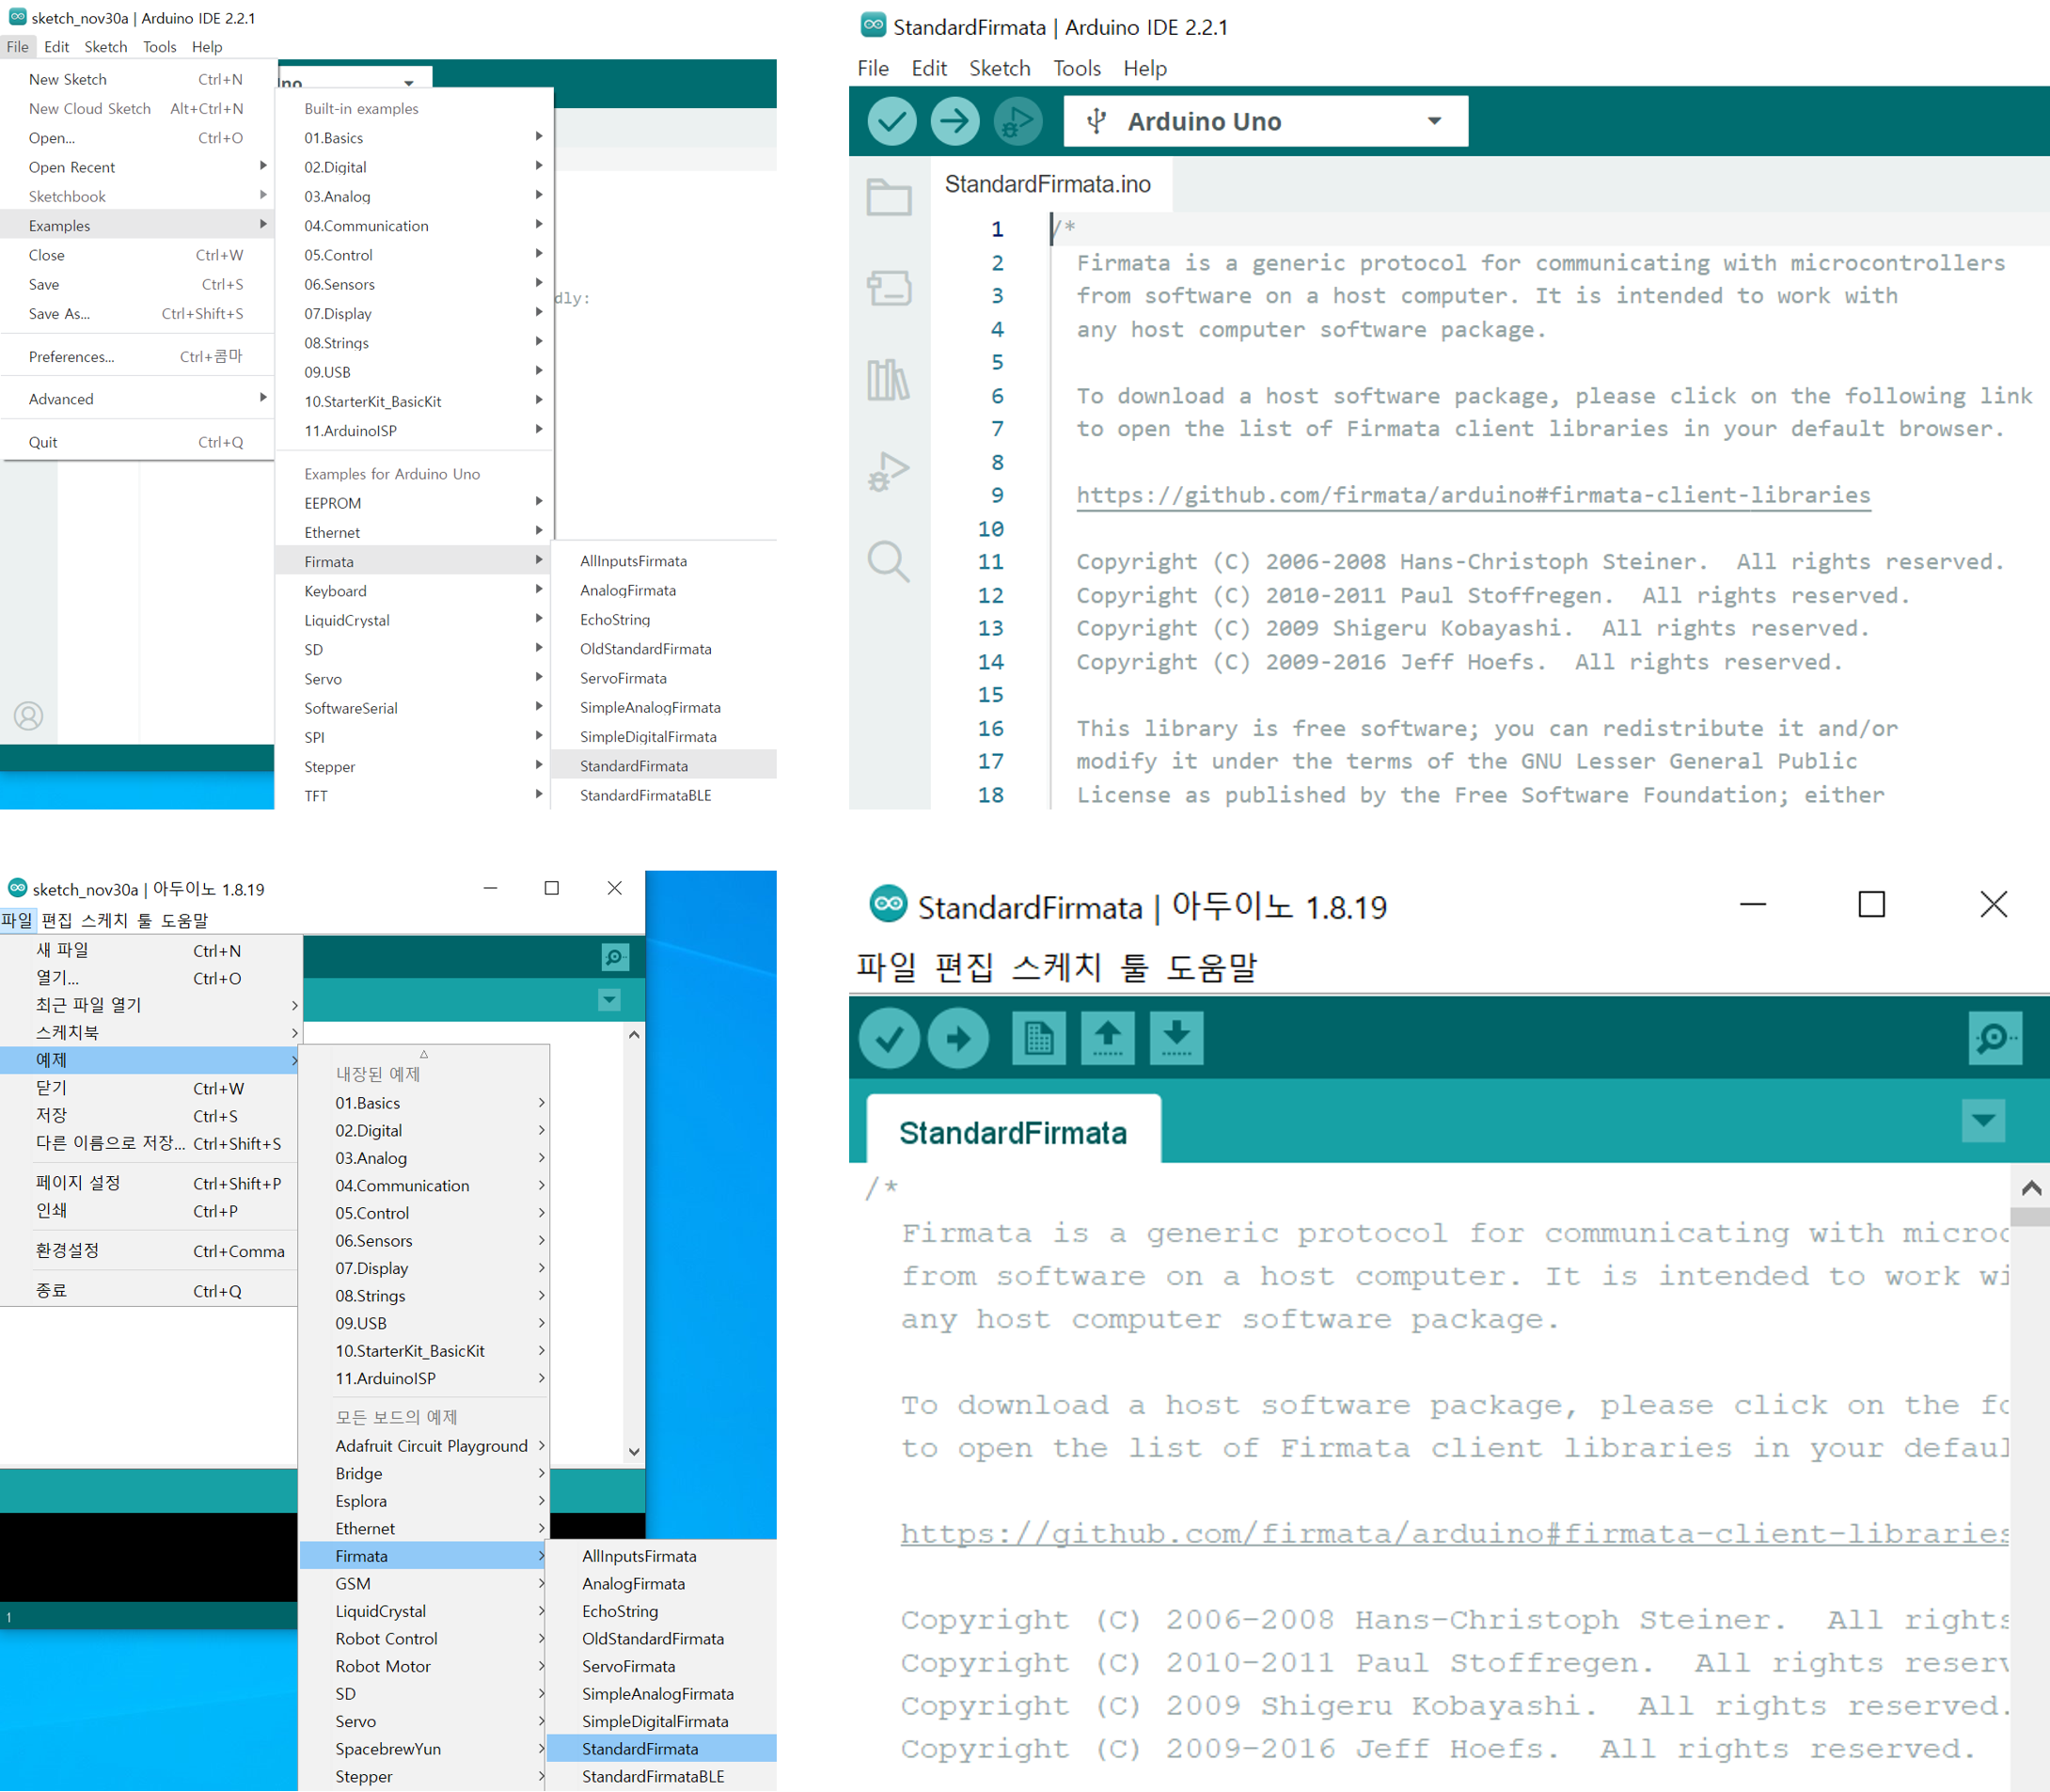
- Load the StandardFirmata example in the Arduino.

- Write the following code in the Python IDLE script opened in step 3 and press F5 to run it
import pyfirmata

test = pyfirmata.Arduino('COM4')

while True:
    test.digital[13].write(1) # Turn on the LED connected to pin 13
    test.pass_time(1)          # Wait for 1 second
    test.digital[13].write(0) # Turn off the LED connected to pin 13
    test.pass_time(1)          # Wait for 1 second
Execution Result
The LED connected to pin 13 of the Arduino blinks on and off every 1 second.