Arduino Libraries
This article is written for the Arduino IDE 2.x version.
Libraries
A collection of pre-written code, classes, and data, modularized for easy use of specific functions.
Structure
- examples folder: Examples of using the library
- .cpp files: Source code files
- .h files: Header files
- Others (keyword files, Readme, etc.)
Example Usage (Controlling a servo motor from 0 to 180 degrees)
- Without using a library to control a servo motor
int servopin = 6;

void setup() {
  pinMode(servopin, OUTPUT);
}

void loop() {
  for (int i = 1000; i < 2000; i++) {
    digitalWrite(servopin, HIGH);
    delayMicroseconds(i);
    digitalWrite(servopin, LOW);
    delayMicroseconds(20);
  }
  delay(500);

  for (int i = 2000; i > 1000; i--) {
    digitalWrite(servopin, HIGH);
    delayMicroseconds(i);
    digitalWrite(servopin, LOW);
    delayMicroseconds(20);
  }
  delay(500);
}
- Using a library to control a servo motor
#include <Servo.h>

Servo servo;
int servopin = 7;

void setup() {
  servo.attach(servopin);
}

void loop() {
  servo.write(0);
  delay(500);
  servo.write(180);
  delay(500);
}
You can see that the for loop part of the non-library code is replaced with the servo.write() in the library-using code.
In addition to servo motors, many sensors and modules can be used more conveniently.
Installing Libraries
Installing via Library Manager
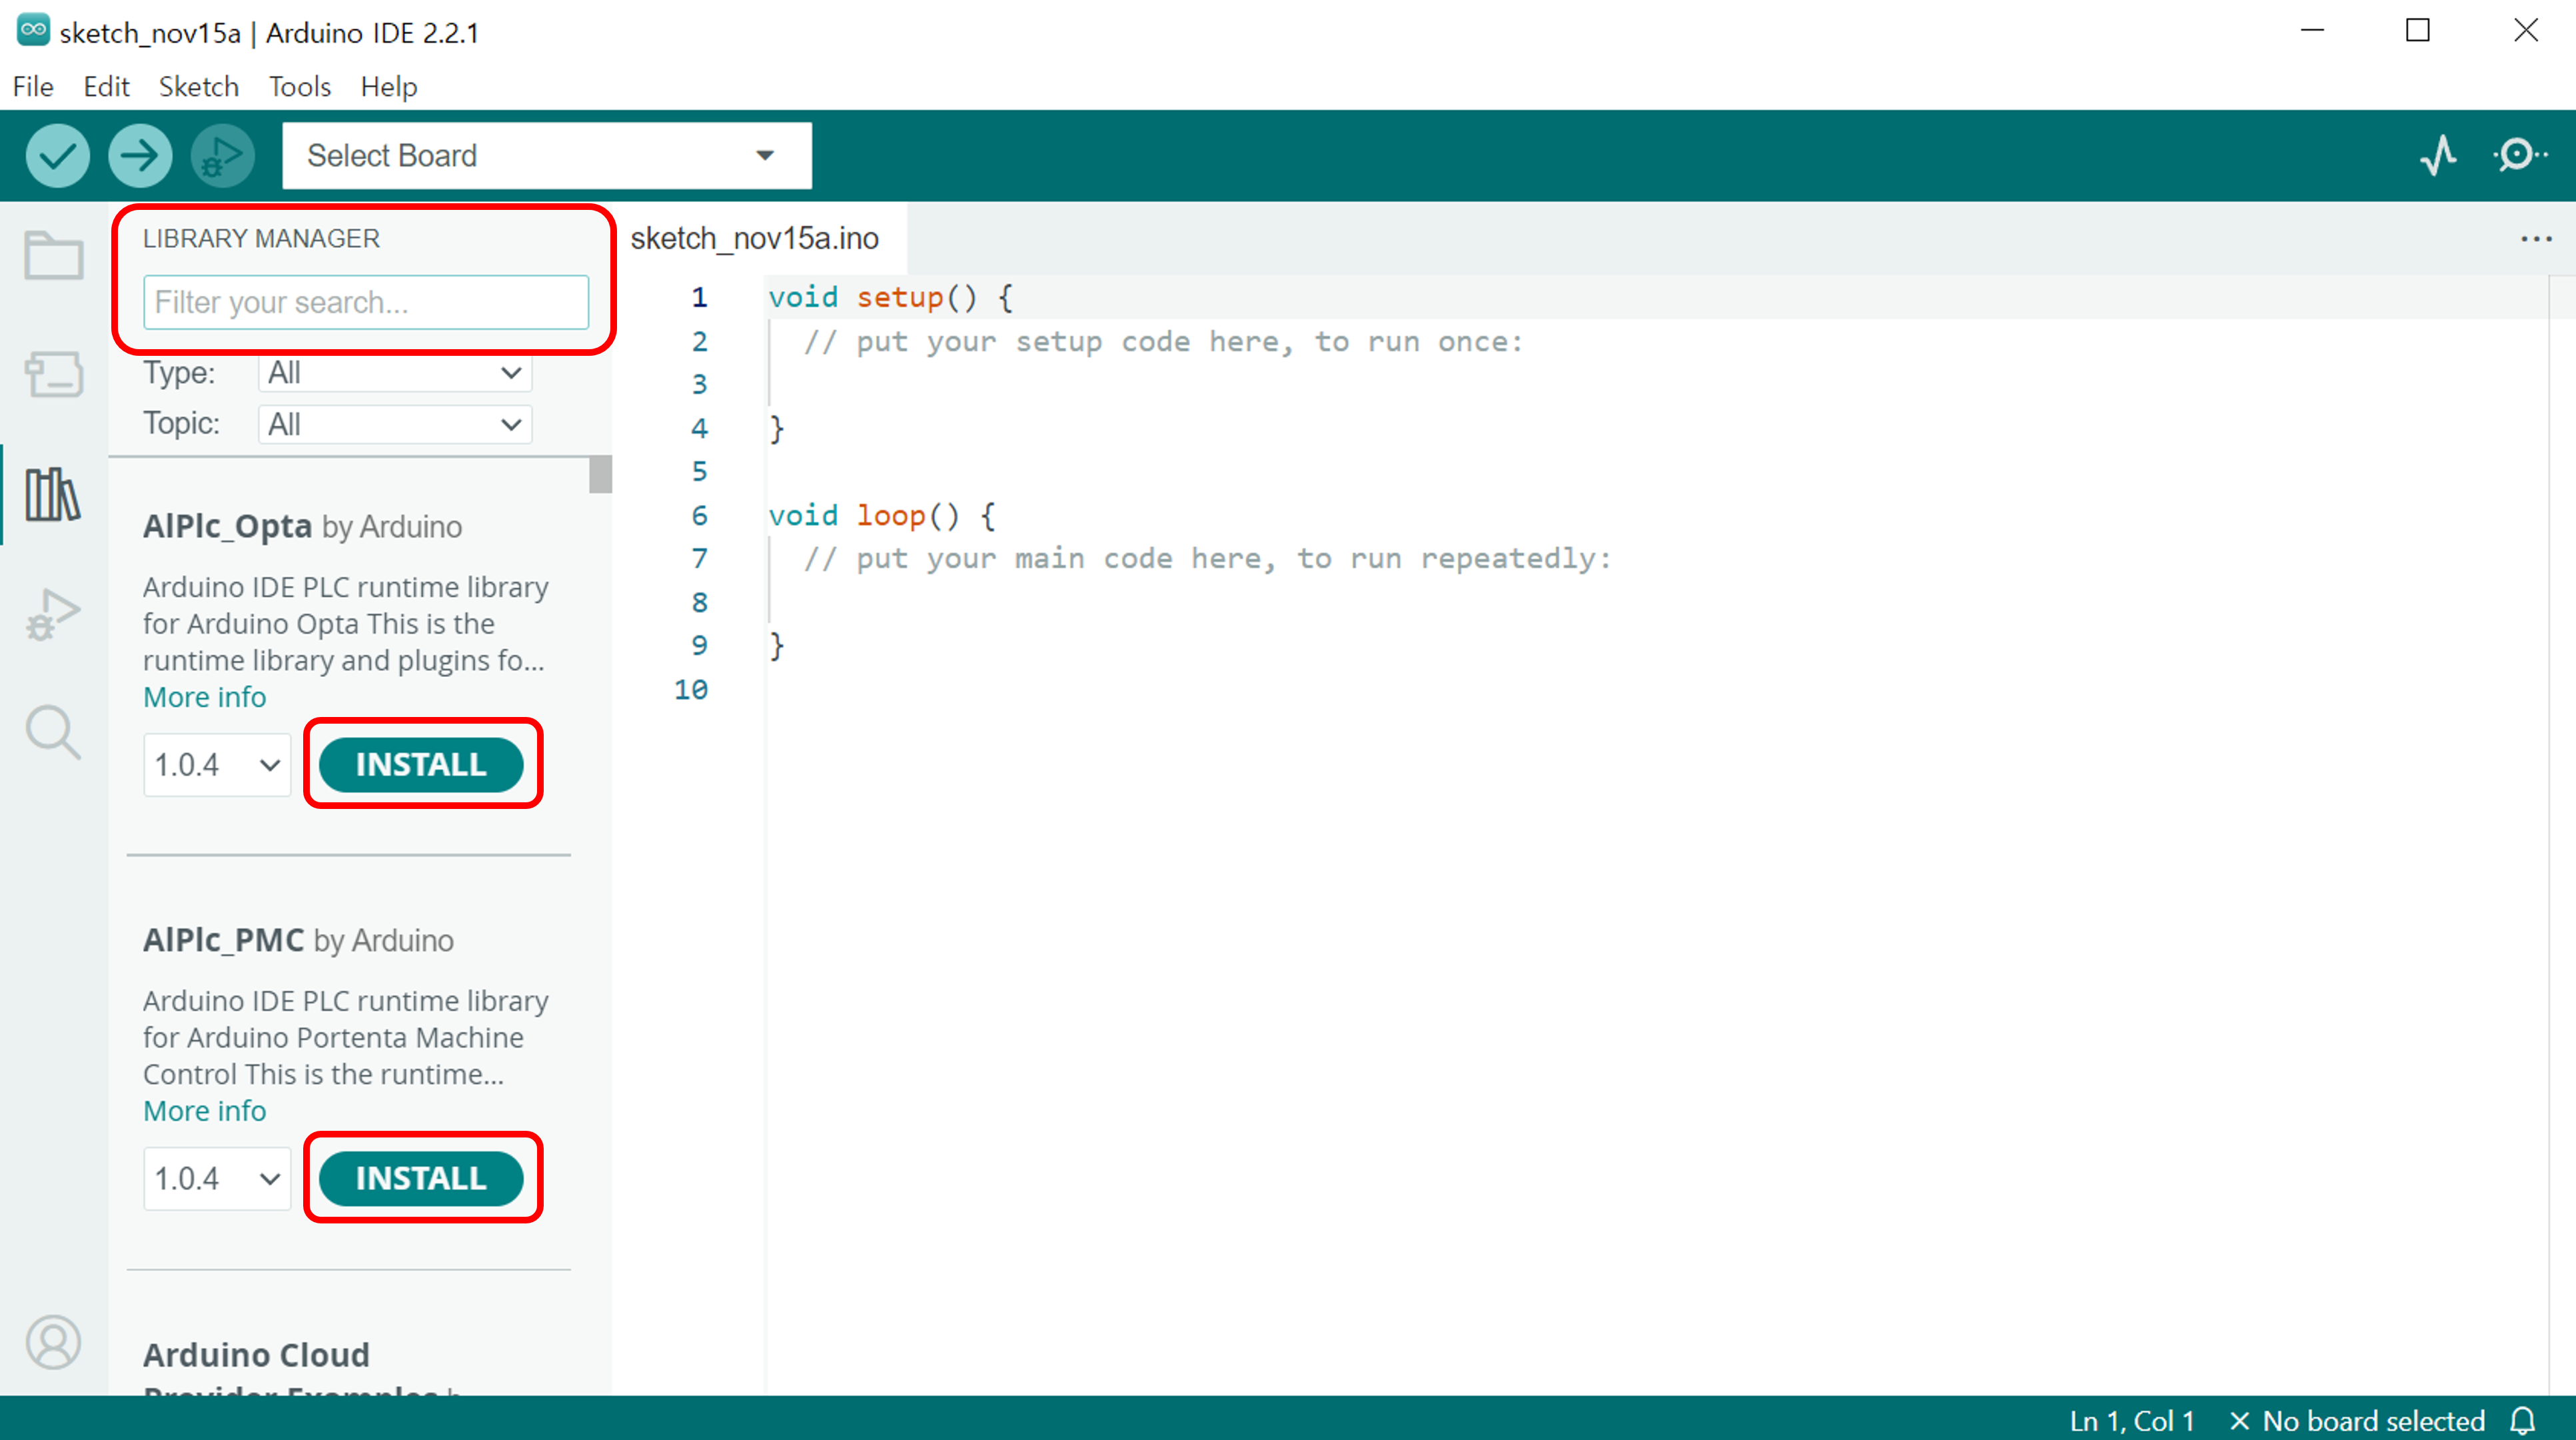
1. Launch the Arduino IDE and press [Ctrl + Shift + i] to open the Library Manager window.
- From Arduino IDE 2.0, a new window will not pop up but open on the left side.
2. earch for the desired library's name in the part shown in the image below.
3. Click the INSTALL button to install the desired library.
- Clicking the More info button takes you to the detailed page of that library.

This method is easy, but some less common sensors or modules might not appear in the Library Manager. In such cases, use the methods below.
Installing from a ZIP file
Search the internet to download the library you want to install as a .zip file.
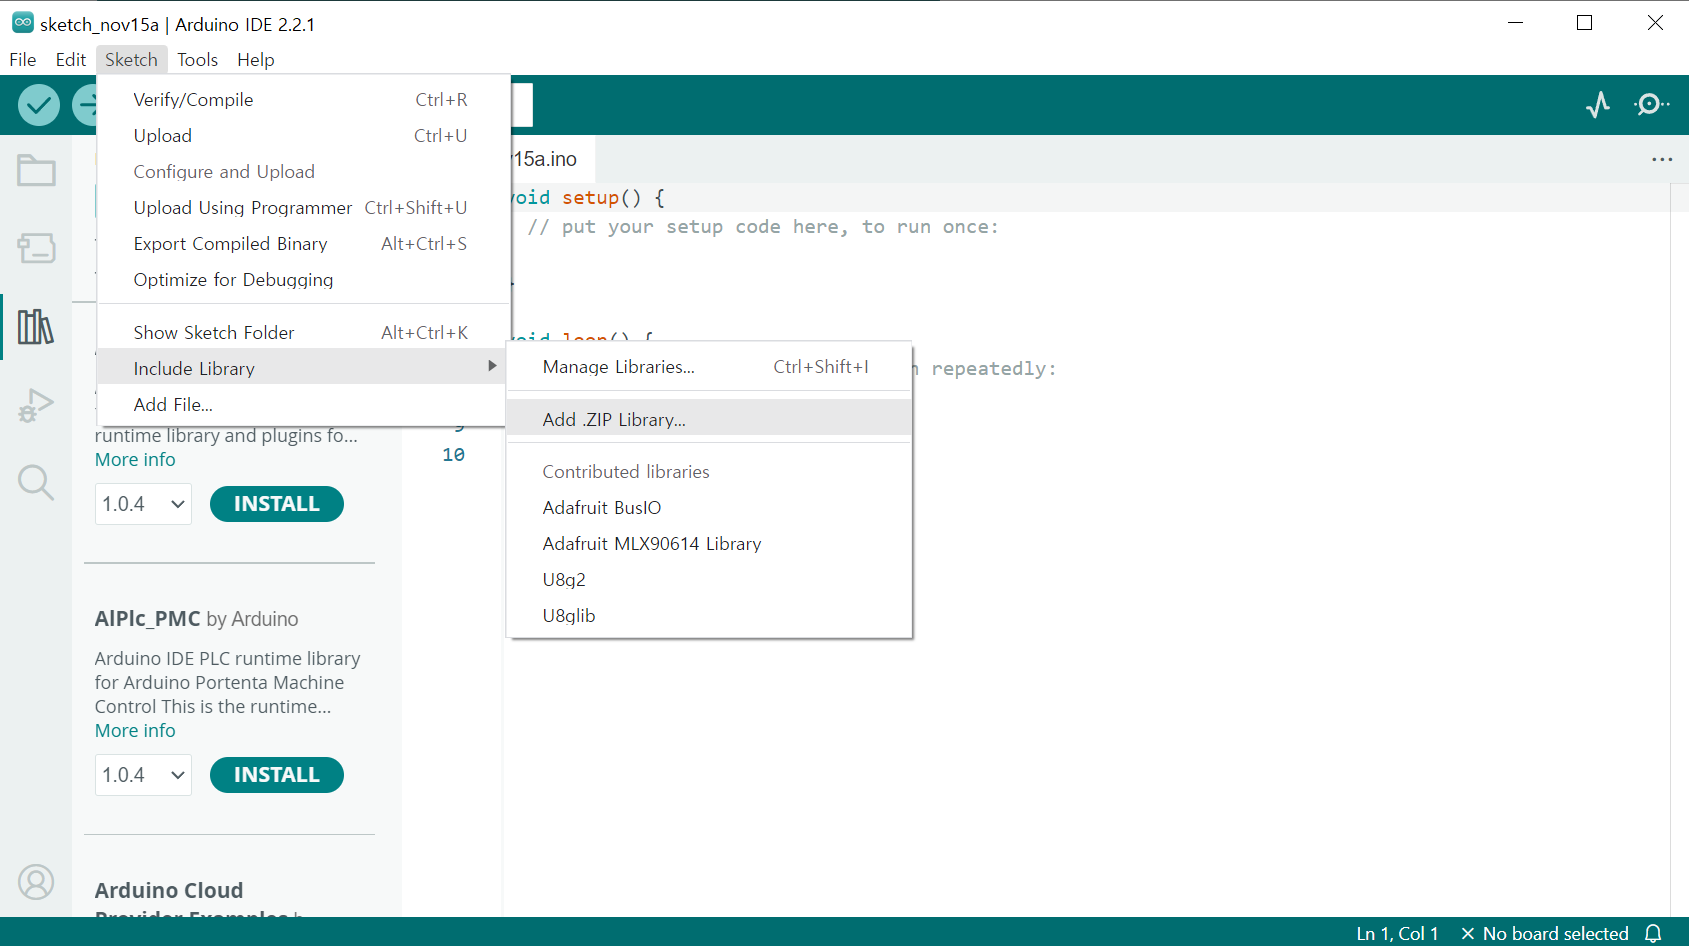
In the Arduino IDE, click [Sketch - Include Library - Add .ZIP Library] and select the .zip file.
Select the .zip file directly without extracting it.

Manual Installation
1. Search the internet to download the necessary library.
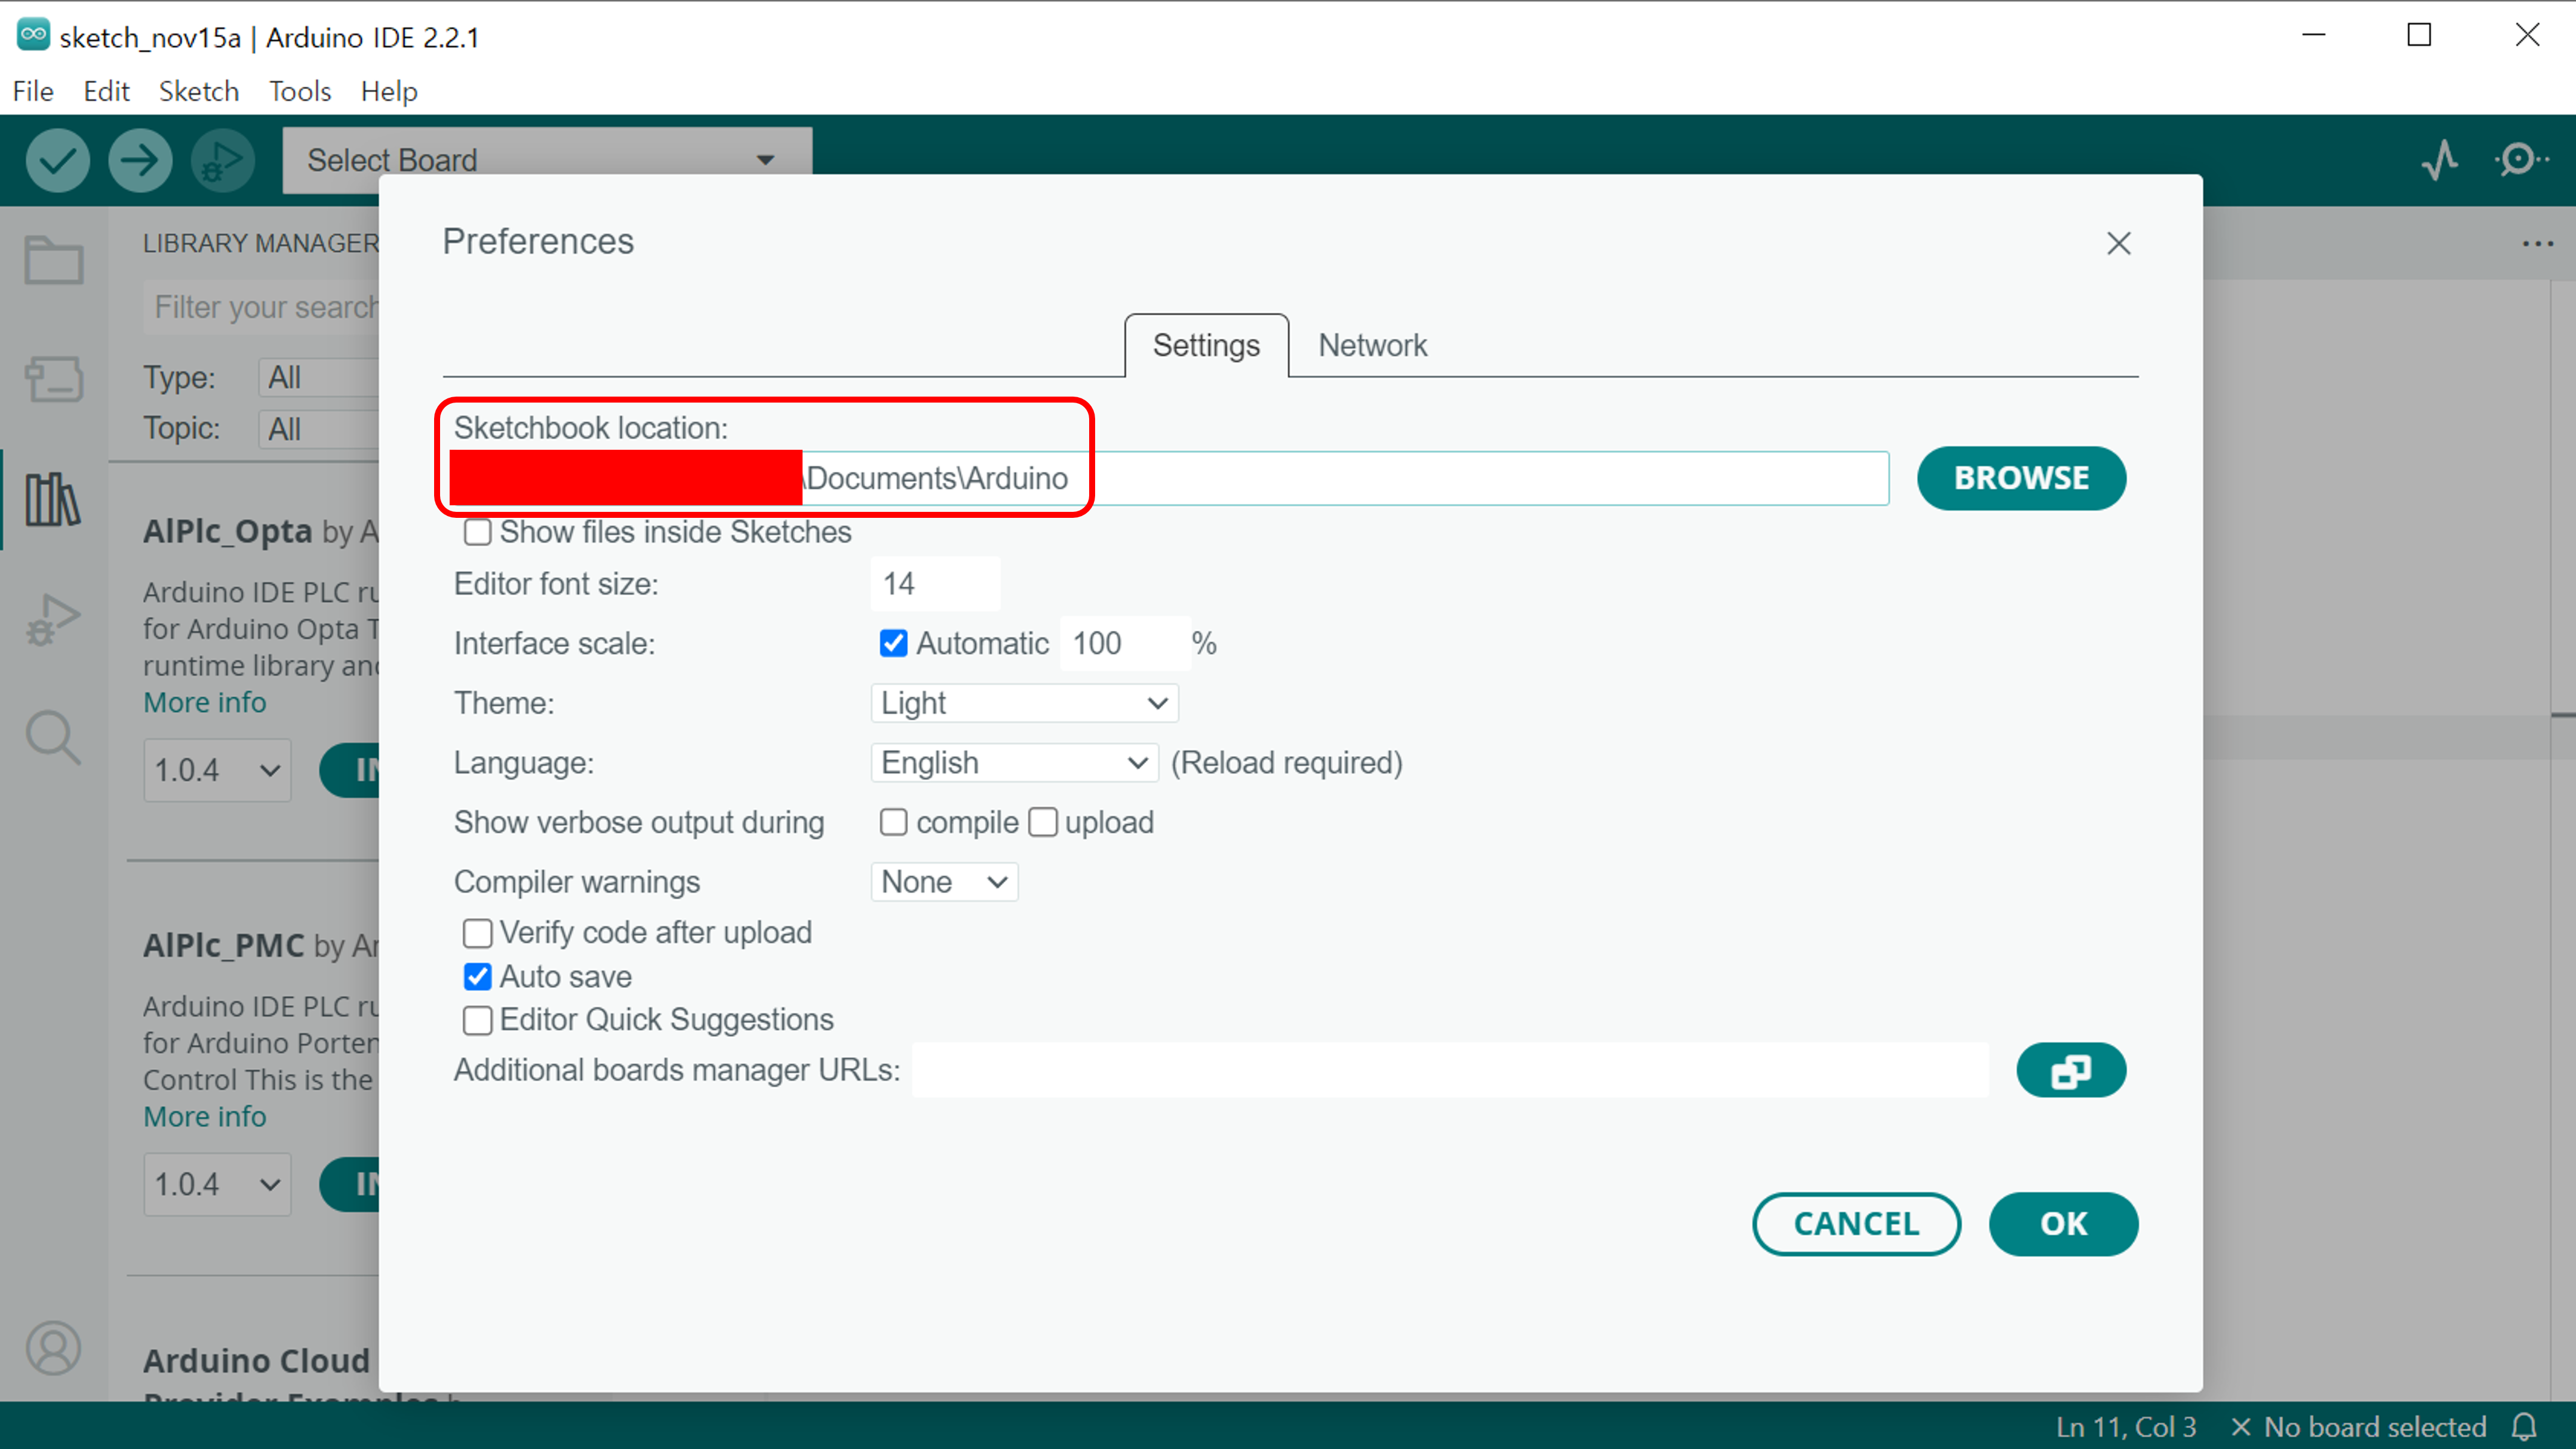
2. Open the preferences in the Arduino IDE with the shortcut [Ctrl + ,] to check the path.

3. Open the folder and navigate to the indicated path, then find the [libraries] folder.
4. Put the downloaded library folder into the libraries folder.
Checking Library Installation
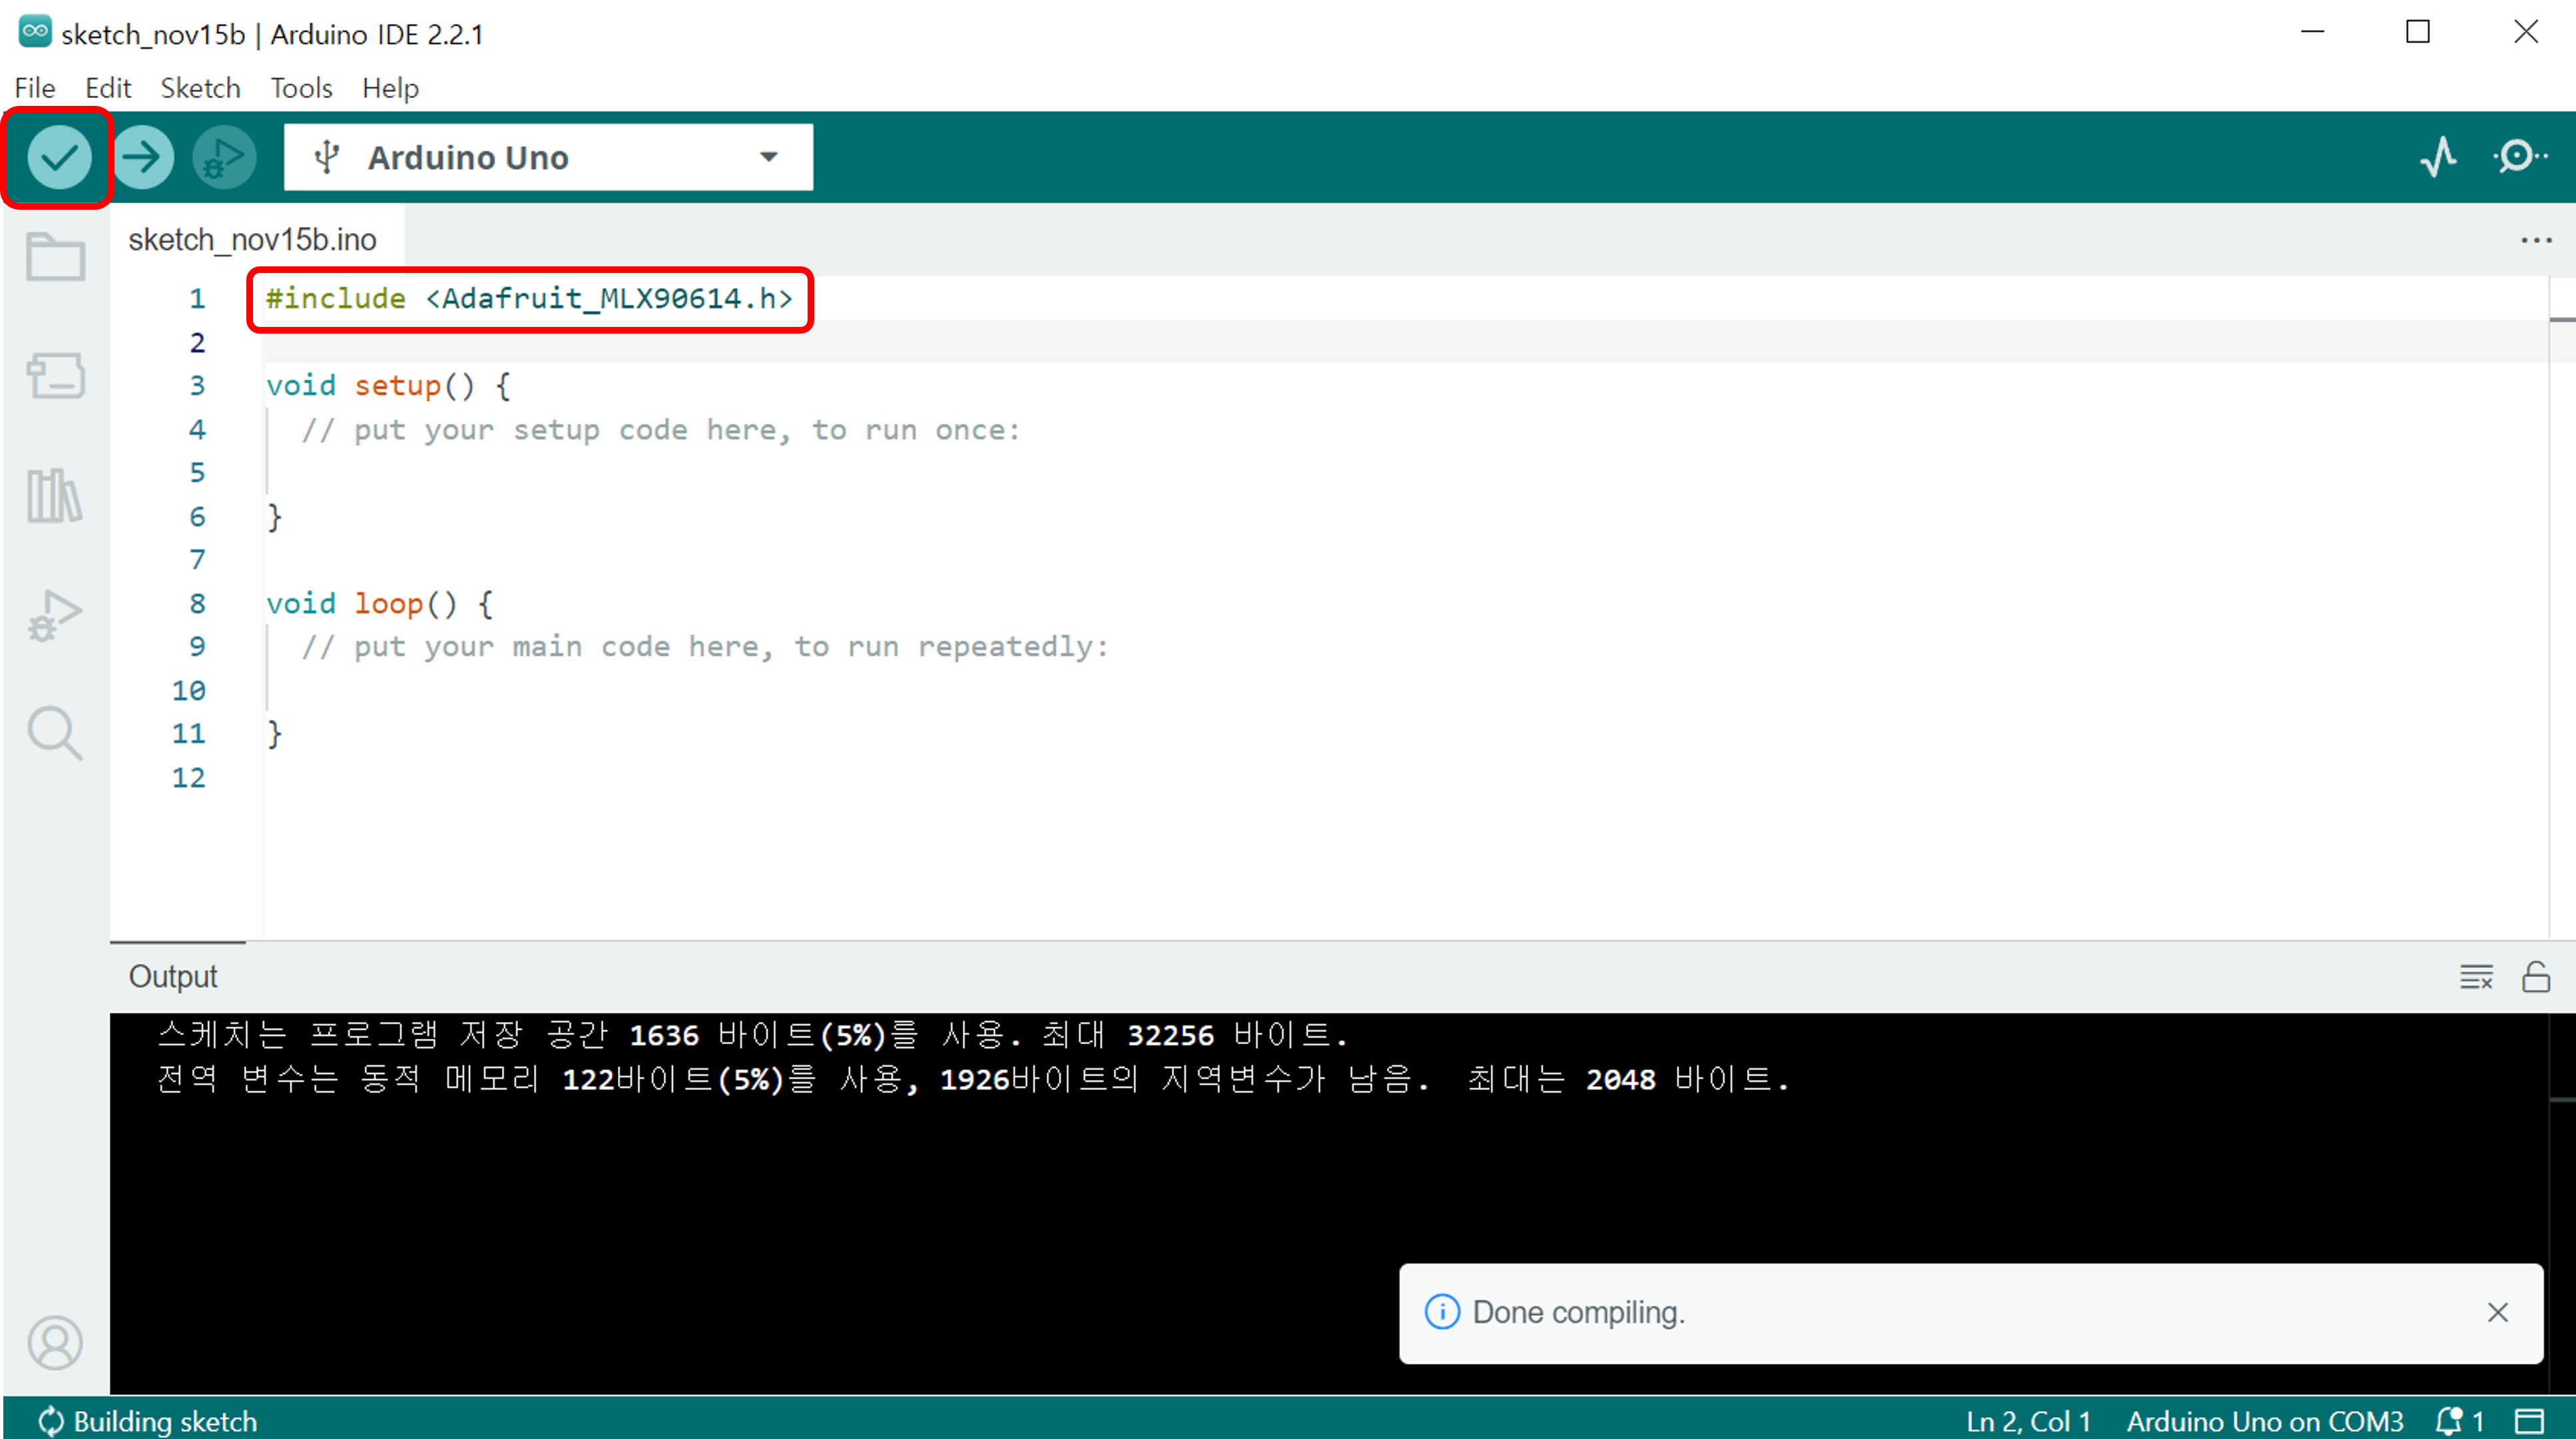
After adding the library to the code, press the check mark to compile.
If the compilation completes without issues, the library has been successfully installed.
