Heart rate Sensor(XD-58C)

Overview
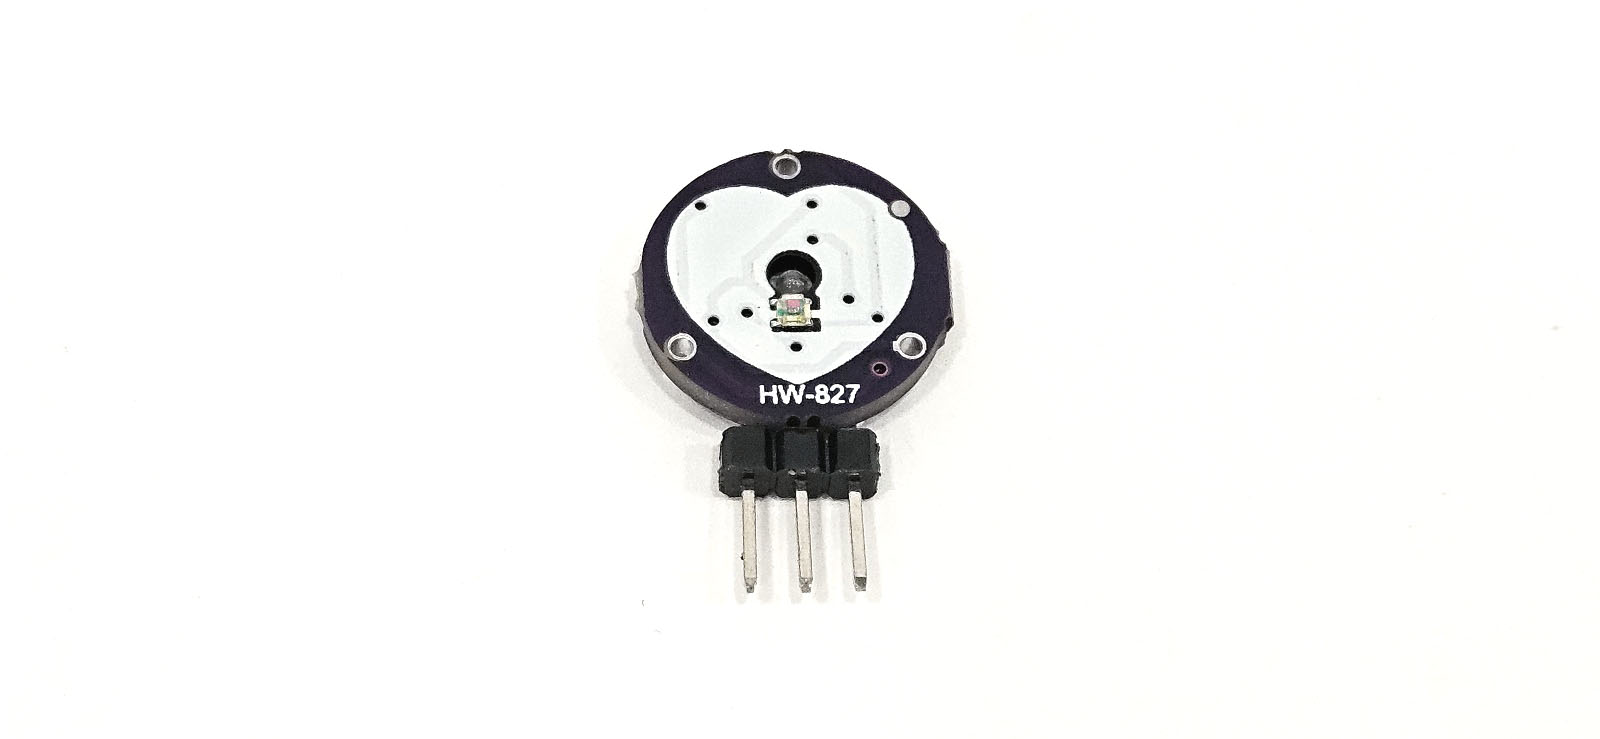
The Arduino heart rate sensor (XD-58C) is a sensor module that can measure heart rate, primarily used for biometric signal monitoring.
In the center of the sensor, a bright green light is emitted, and when the heart beats, the increase in blood flow reduces the amount of light reflected back, which is used to measure the heart rate.
It is easy to connect, allowing for straightforward heart rate data output with Arduino.
Specifications
| List | Details |
|---|---|
| Power Interface | Pin |
| Voltage | 3.3-5V |
| Current | 10mA |
| Size | Diameter 1.6cm |
| Weight | 5g |
Application Example
An example of checking heart rate using the serial monitor and serial plotter.
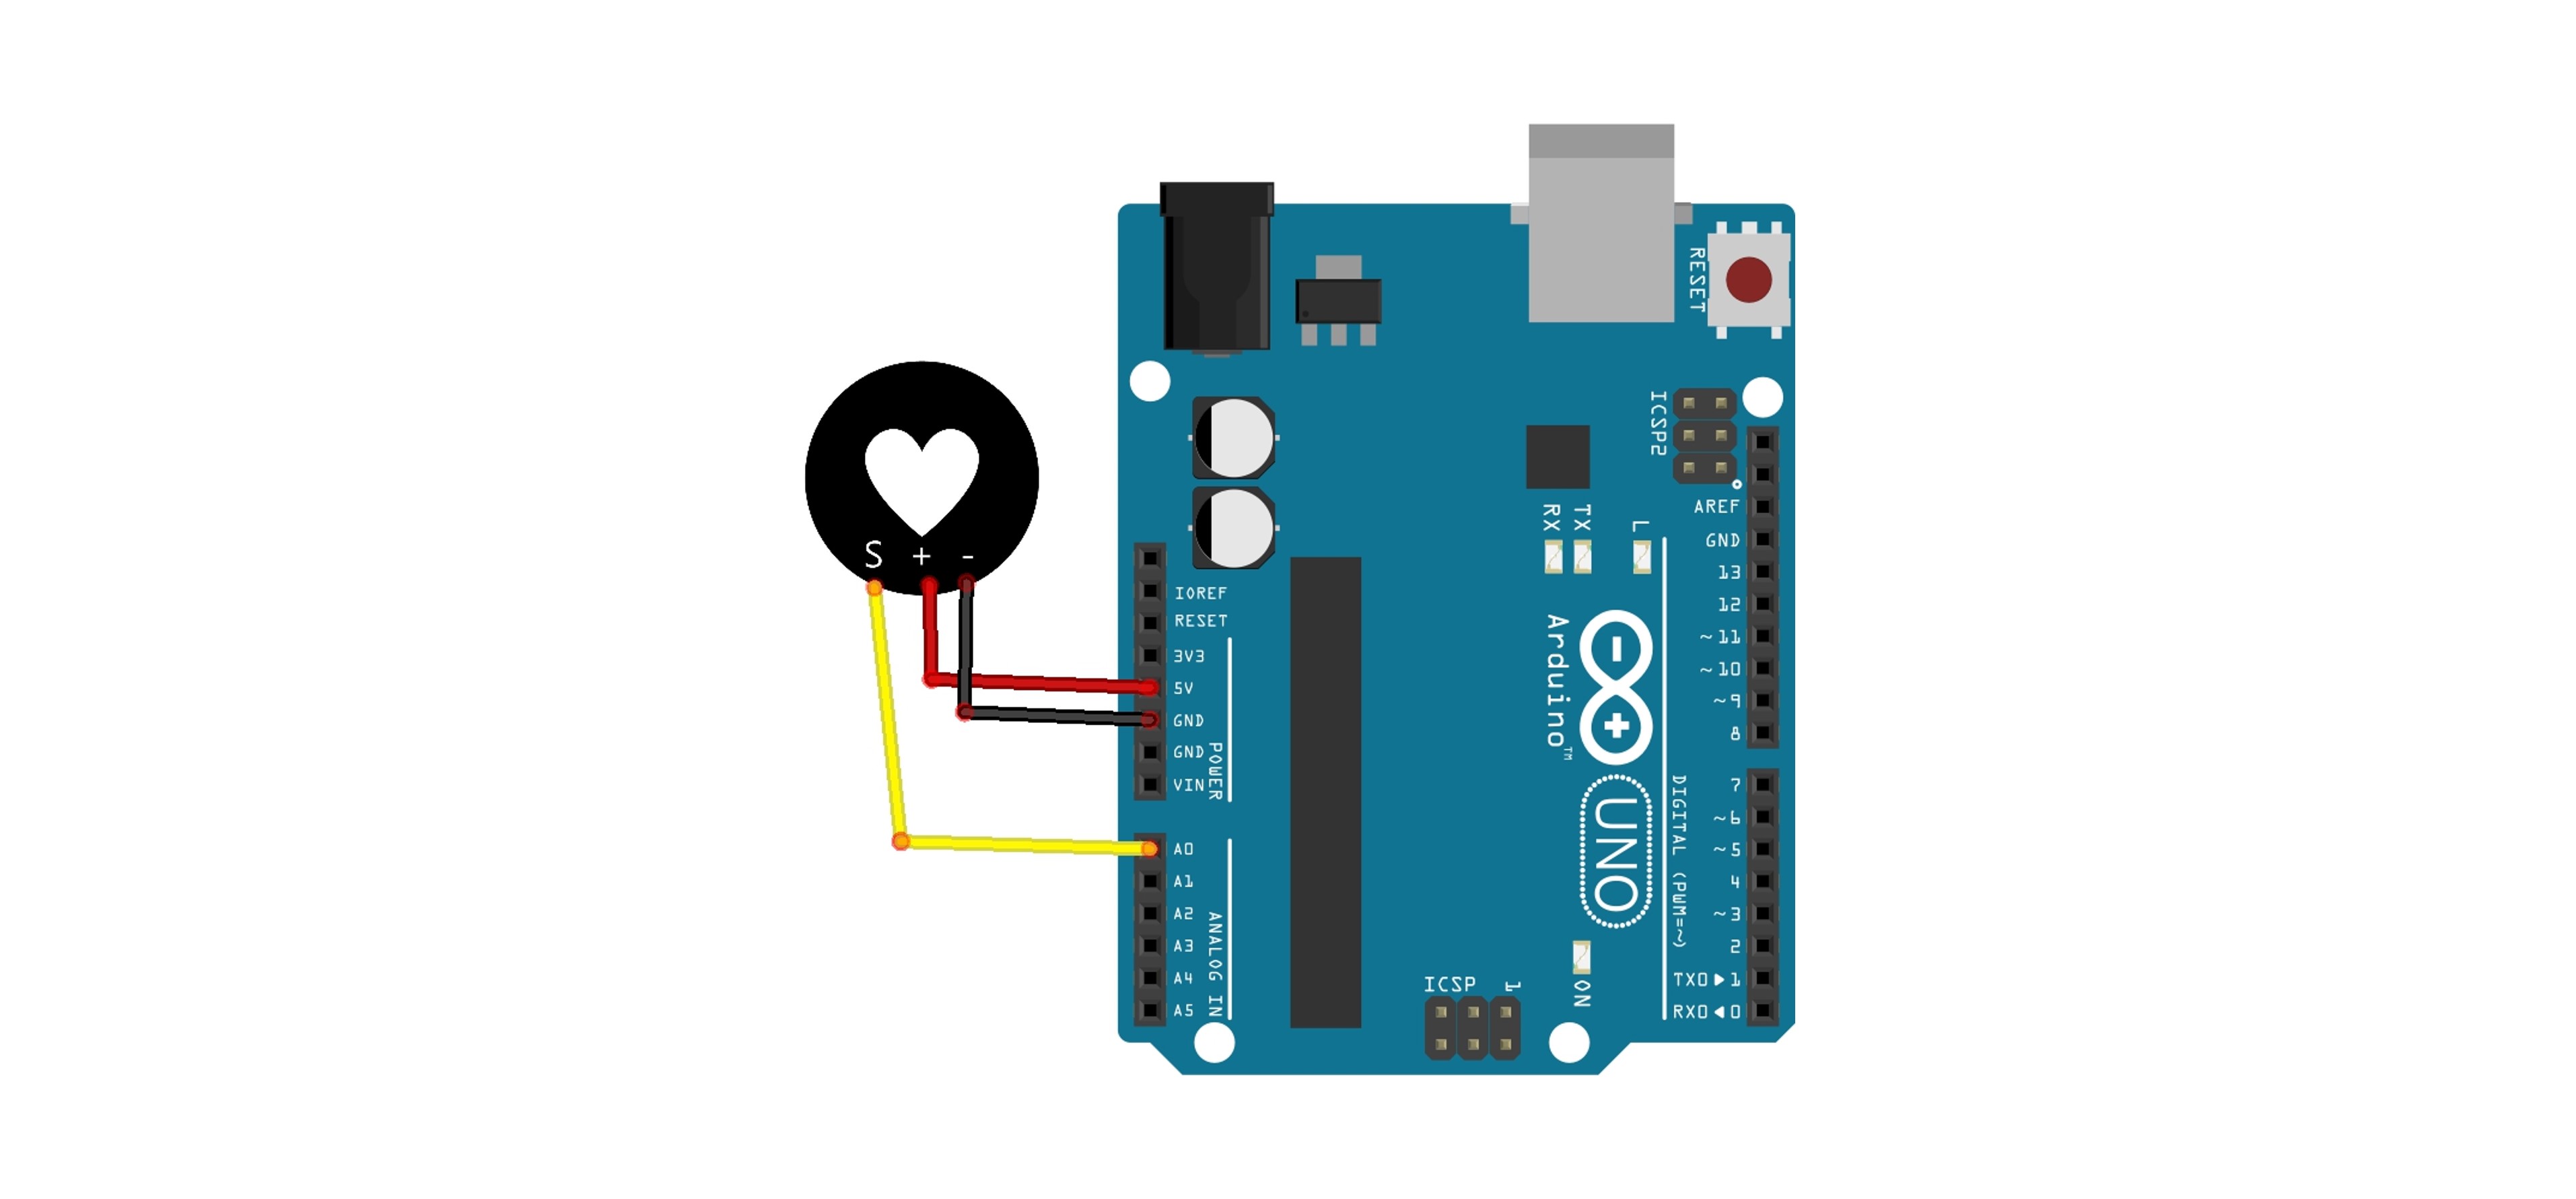
1. Circuit
| Arduino | XD-58C Pin |
|---|---|
| S | A0 Pin |
| + | 5V |
| - | GND |

2. Code
Library
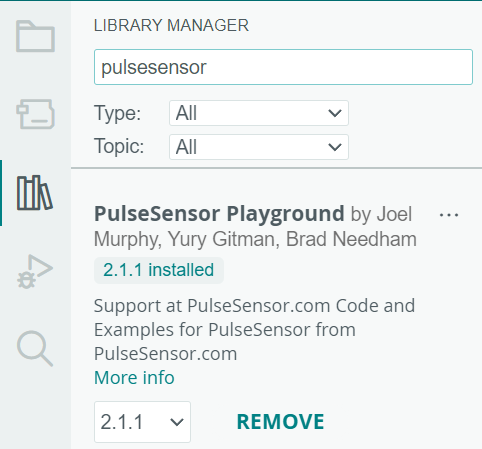
Please add the PulseSensorPlayground library.
You can download it by searching for "pulsesensor" in the library manager.
For detailed instructions on how to use the library, please refer to the 아두이노 라이브러리 documentation.
Code
#include <PulseSensorPlayground.h>  // Include PulseSensorPlayground Library

const int PulseWire = 0;       // Connect the purple wire of the PulseSensor to analog pin 0
const int LED = LED_BUILTIN;   // Arduino built-in LED pin, usually close to pin 13
int Threshold = 550;           // Set the threshold for signals to be recognized as heartbeats

// Create PulseSensorPlayground object
PulseSensorPlayground pulseSensor;

void setup() {
  Serial.begin(9600);  // Start serial monitor

  // PulseSensor 객체 설정
  pulseSensor.analogInput(PulseWire);
  pulseSensor.blinkOnPulse(LED);       // Set the Arduino LED to blink automatically when a heartbeat is detected.
  pulseSensor.setThreshold(Threshold);

  // Check if the PulseSensor object has been created successfully.
  if (pulseSensor.begin()) {
    Serial.println("We created a pulseSensor Object !");  // Output once when the Arduino is powered on or reset.
  }
}

void loop() {
  if (pulseSensor.sawStartOfBeat()) {            // Continuously check if a heartbeat is detected.
    int myBPM = pulseSensor.getBeatsPerMinute();  // Retrieve the BPM (beats per minute) value.
    Serial.println(myBPM);  // Output the BPM value to the serial plotter.
  }

  delay(20);  // Recommended delay time in a simple sketch.
}
3. Execution Result
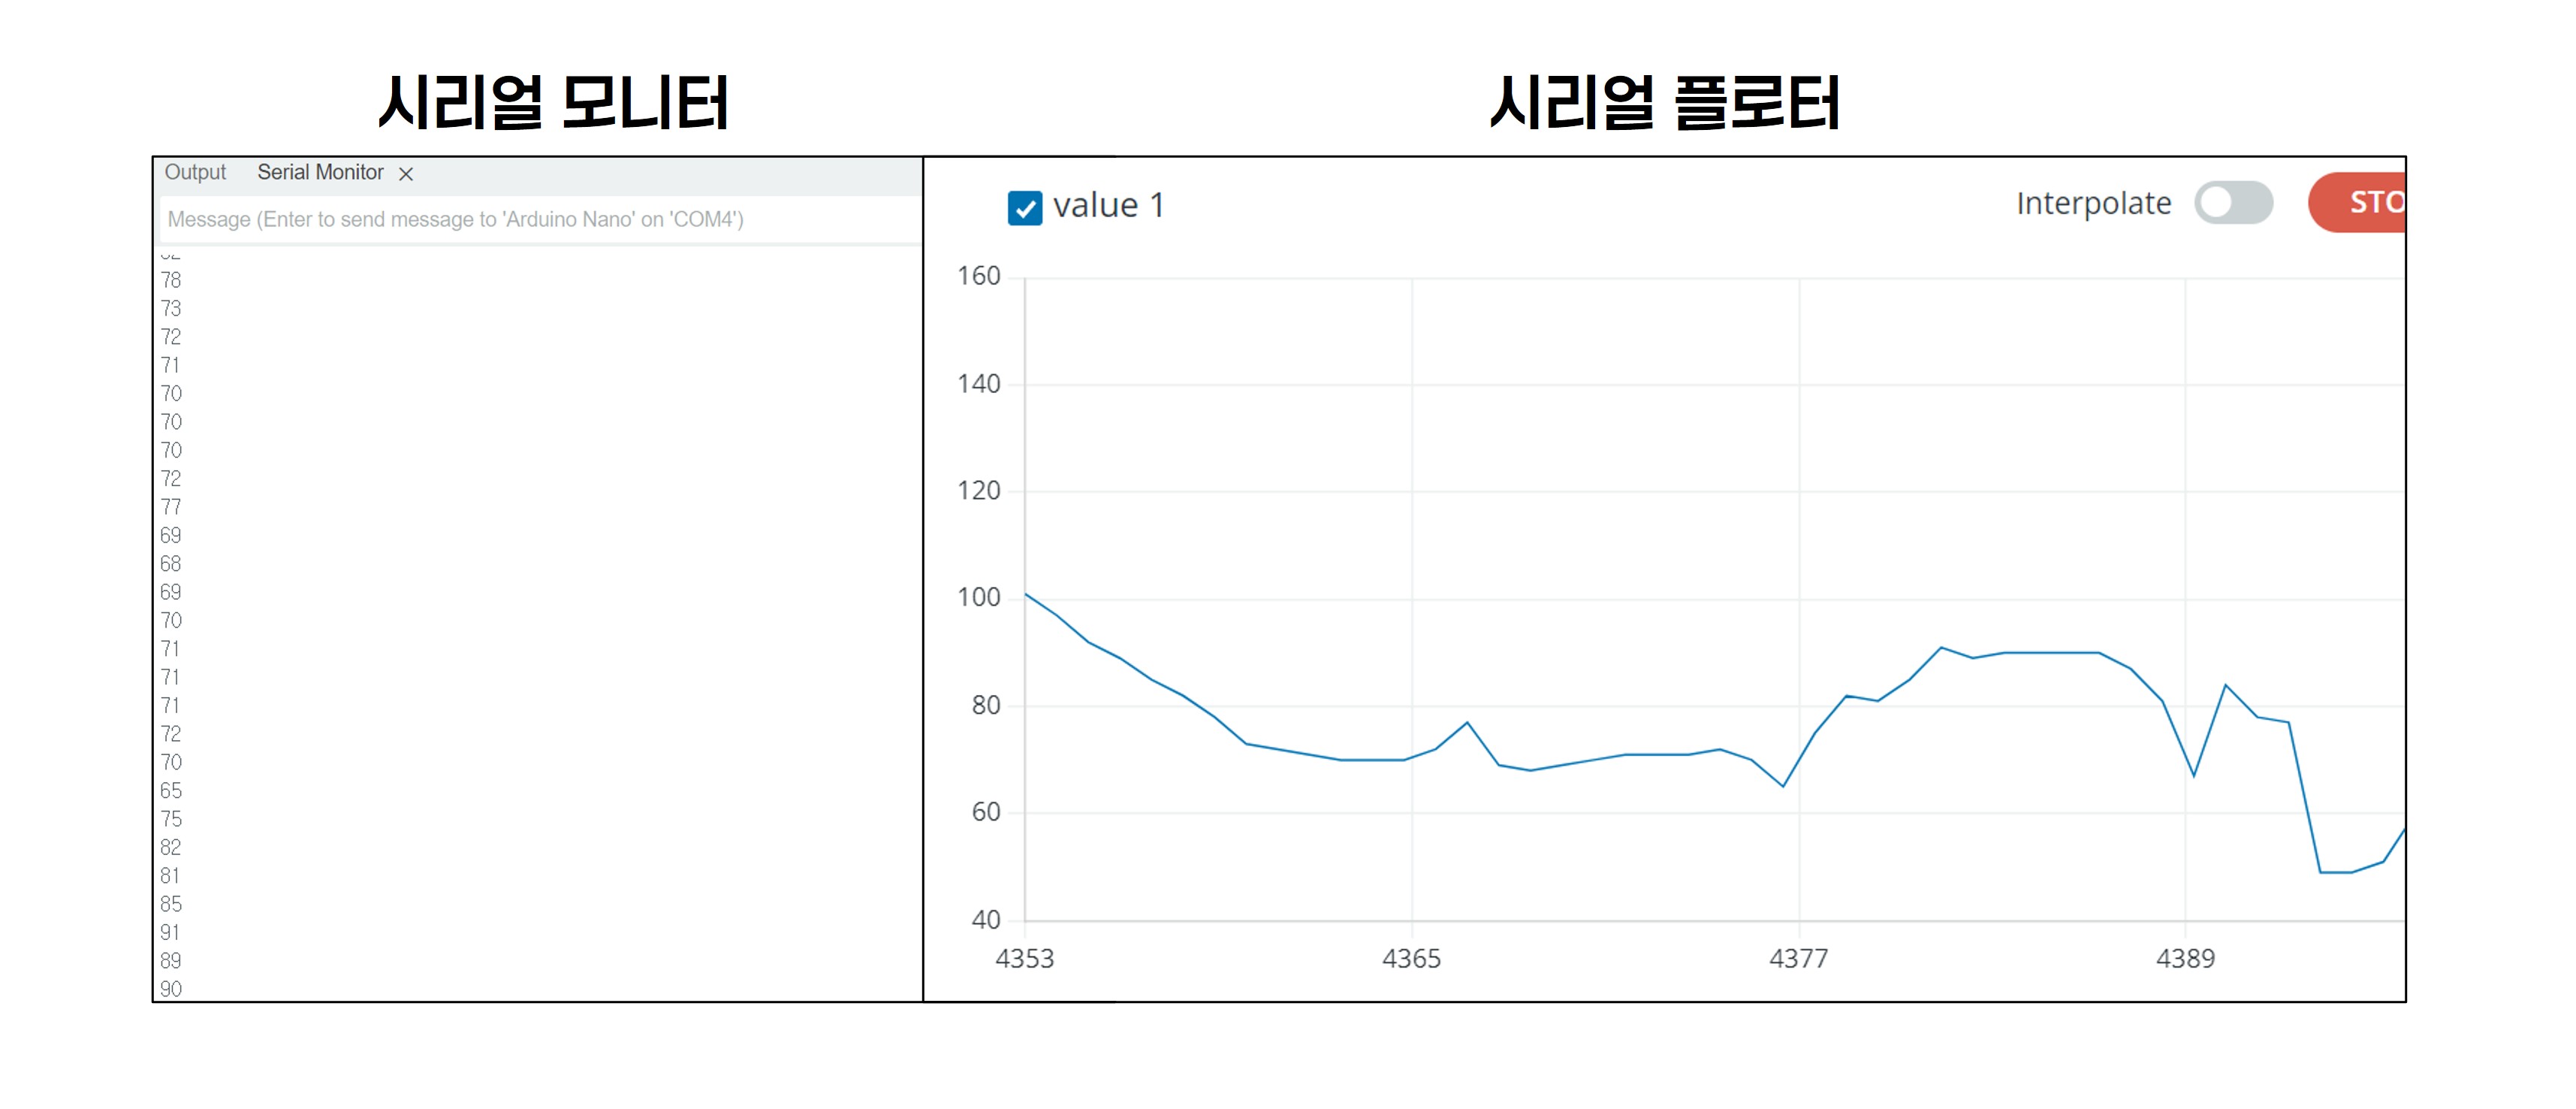
When you cover the area with the heart drawing and apply light pressure with your finger, you can see the BPM output as follows.

Applications
The following Arduino projects can be used in various ways related to the content below.
- Health Monitoring System : Real-time monitoring of an individual's heart rate to track and manage health status.
- Sports and Fitness Tracking : Measuring heart rate during exercise to adjust workout intensity and analyze fitness performance.
- Medical Research : Collecting and analyzing biometric signal data for various medical research applications.
- Wearable Devices : Implemented in wearable devices such as smartwatches or fitness bands to provide real-time heart rate monitoring functionality.
