LCD(Liquid Crystal Display) En: 두 판 사이의 차이
(Created page with "center|frameless center|frameless") |
편집 요약 없음 |
||
| 1번째 줄: | 1번째 줄: | ||
[[File:1602LCD대표이미지1.jpg|center| | [[File:1602LCD대표이미지1.jpg|center|class=coders70]] | ||
[[File:1602LCD대표이미지2.jpg|center| | [[File:1602LCD대표이미지2.jpg|center|class=coders70]]It's a module for controlling a 16x2 LCD with just four wires via I2C communication. | ||
The I2C address is mostly [0x27], but there are occasional exceptions, so it's recommended to check the address before use. | |||
== Specifications and Required Hardware == | |||
* Operating Voltage: 5V | |||
* 16x2 LCD I2C MODULE | |||
* Arduino UNO | |||
* UNO Cable | |||
* F-M Cable (4ea) | |||
== Libraries == | |||
* Wire (No need to install as it's a default library.) | |||
* LiquidCrystal I2C | |||
== Connections == | |||
{| class="wikitable" | |||
|+ | |||
!'''I2C LCD''' | |||
!'''Arduino UNO''' | |||
|- | |||
|GND | |||
|GND | |||
|- | |||
|VCC | |||
|5V | |||
|- | |||
|SDA | |||
|A4 | |||
|- | |||
|SCL | |||
|A5 | |||
|} | |||
[[File:LCD1602 회로.png|center|class=coders100]] | |||
== How to Check the Address == | |||
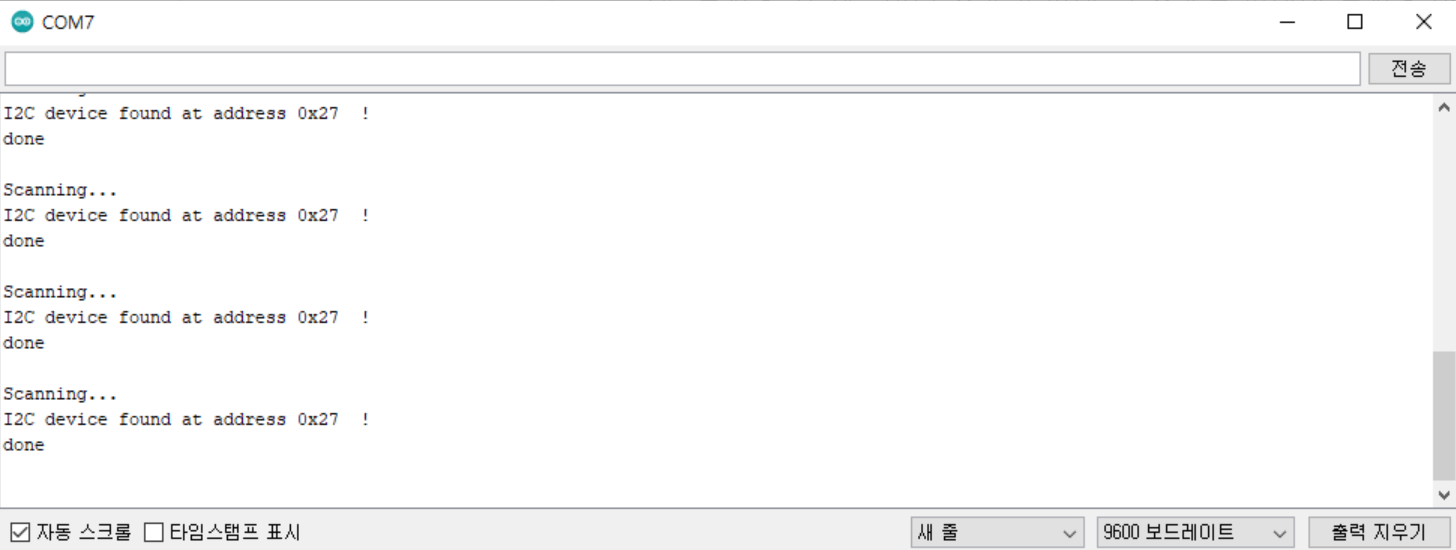
You can verify the address by uploading the following code and then running the Serial Monitor.<syntaxhighlight lang="cpp" line="1"> | |||
#include <Wire.h> | |||
#include <LiquidCrystal_I2C.h> | |||
LiquidCrystal_I2C lcd(0x27, 16, 2); | |||
void setup() | |||
{ | |||
// Initialize the LCD before use. | |||
lcd.init(); | |||
// Turn on the LCD backlight. | |||
lcd.backlight(); | |||
// Set the LCD cursor position to (0,0) (top left corner). | |||
lcd.setCursor(0, 0); | |||
// Write the text to display. | |||
lcd.print("Gongzipsa"); | |||
// Move the LCD cursor to position (0,1). | |||
lcd.setCursor(0, 1); | |||
// Print the value of val. | |||
int val = 1004; | |||
lcd.print(val); | |||
} | |||
void loop(){} | |||
</syntaxhighlight> | |||
[[File:LCD1602 주소 확인.png|center|class=coders100]] | |||
== Example Code == | |||
<syntaxhighlight lang="cpp" line="1"> | |||
#include <Wire.h> | |||
#include <LiquidCrystal_I2C.h> | |||
LiquidCrystal_I2C lcd(0x27, 16, 2); | |||
void setup() | |||
{ | |||
// Initialize the LCD before use. | |||
lcd.init(); | |||
// Turn on the LCD backlight. | |||
lcd.backlight(); | |||
// Set the LCD cursor position to (0,0) (top left corner). | |||
lcd.setCursor(0, 0); | |||
// Write the text to display. | |||
lcd.print("Gongzipsa"); | |||
// Move the LCD cursor to position (0,1). | |||
lcd.setCursor(0, 1); | |||
// Print the value of val. | |||
int val = 1004; | |||
lcd.print(val); | |||
} | |||
void loop(){} | |||
</syntaxhighlight> | |||
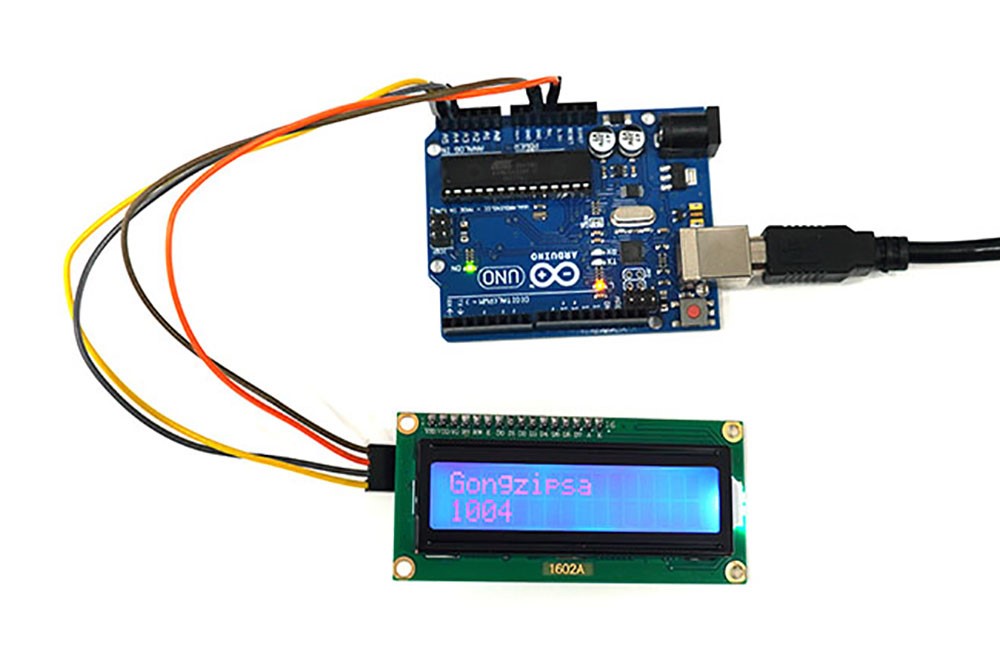
=== Example Code Result: === | |||
[[File:LCD1602 예제.jpg|center|class=coders100]] | |||
== Additional Information == | |||
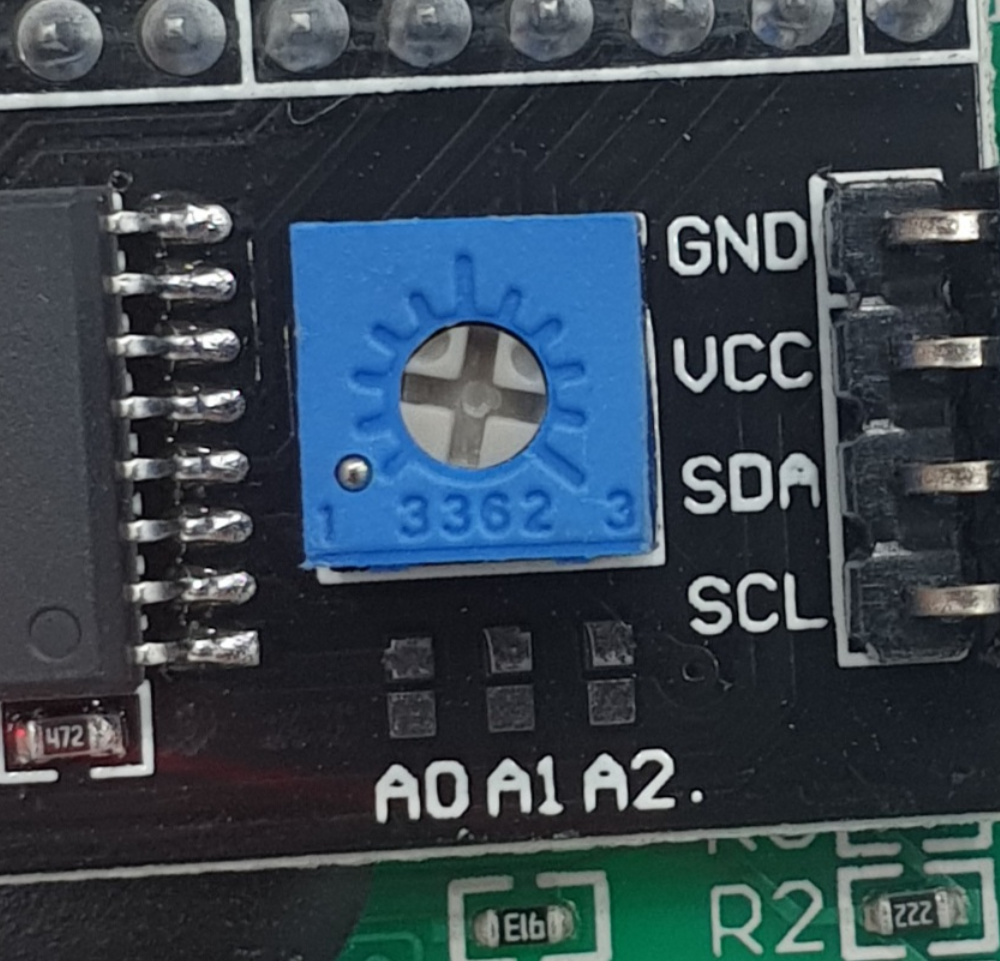
The brightness of the LCD text can be adjusted by controlling the variable resistor. | |||
[[File:LCD1602 가변저항.png|center|class=coders50]] | |||
2024년 3월 23일 (토) 15:34 판
It's a module for controlling a 16x2 LCD with just four wires via I2C communication.
The I2C address is mostly [0x27], but there are occasional exceptions, so it's recommended to check the address before use.
Specifications and Required Hardware
- Operating Voltage: 5V
- 16x2 LCD I2C MODULE
- Arduino UNO
- UNO Cable
- F-M Cable (4ea)
Libraries
- Wire (No need to install as it's a default library.)
- LiquidCrystal I2C
Connections
| I2C LCD | Arduino UNO |
|---|---|
| GND | GND |
| VCC | 5V |
| SDA | A4 |
| SCL | A5 |

How to Check the Address
You can verify the address by uploading the following code and then running the Serial Monitor.
#include <Wire.h>
#include <LiquidCrystal_I2C.h>
LiquidCrystal_I2C lcd(0x27, 16, 2);

void setup()
{
  // Initialize the LCD before use.
  lcd.init();

  // Turn on the LCD backlight.
  lcd.backlight();

  // Set the LCD cursor position to (0,0) (top left corner).
  lcd.setCursor(0, 0);

  // Write the text to display.
  lcd.print("Gongzipsa");

  // Move the LCD cursor to position (0,1).
  lcd.setCursor(0, 1);

  // Print the value of val.
  int val = 1004;
  lcd.print(val);
}

void loop(){}

Example Code
#include <Wire.h>
#include <LiquidCrystal_I2C.h>
LiquidCrystal_I2C lcd(0x27, 16, 2);

void setup()
{
  // Initialize the LCD before use.
  lcd.init();

  // Turn on the LCD backlight.
  lcd.backlight();

  // Set the LCD cursor position to (0,0) (top left corner).
  lcd.setCursor(0, 0);

  // Write the text to display.
  lcd.print("Gongzipsa");

  // Move the LCD cursor to position (0,1).
  lcd.setCursor(0, 1);

  // Print the value of val.
  int val = 1004;
  lcd.print(val);
}

void loop(){}
Example Code Result:

Additional Information
The brightness of the LCD text can be adjusted by controlling the variable resistor.
