LCD(Liquid Crystal Display): 두 판 사이의 차이
잔글편집 요약 없음 |
잔글편집 요약 없음 |
||
| 144번째 줄: | 144번째 줄: | ||
==== 2-2. 실행 결과 ==== | ==== 2-2. 실행 결과 ==== | ||
=== [[파일:LCD1602 예제.jpg|class=coders100]]3. | === [[파일:LCD1602 예제.jpg|class=coders100]]3. === | ||
== | == '''참고 문서''' == | ||
[https://docs.arduino.cc/learn/electronics/lcd-displays/ 아두이노 LCD Doc] | |||
== '''구매 링크''' == | == '''구매 링크''' == | ||
[https://gongzipsa.com/shop/search.php?q=lcd 공집사몰] | [https://gongzipsa.com/shop/search.php?q=lcd 공집사몰] | ||
2024년 7월 12일 (금) 20:29 판
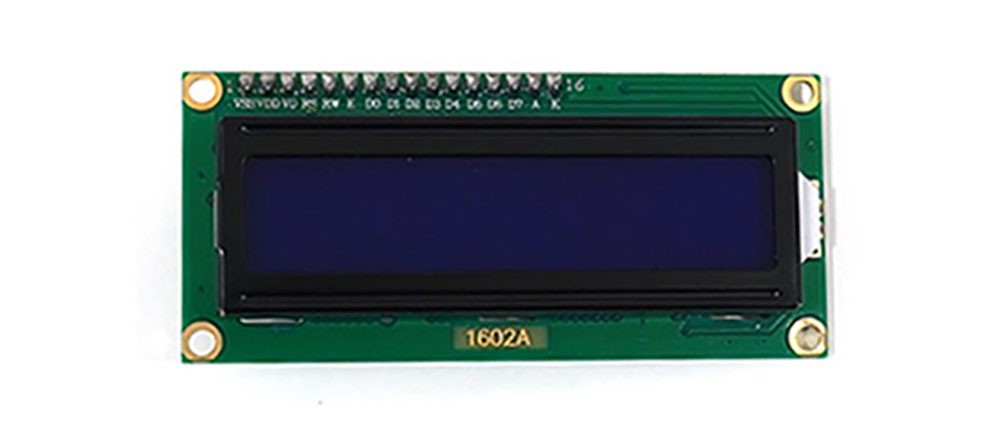
아두이노 LCD 모듈은 문자나 숫자를 디스플레이하기 위해 사용하는 모듈로, 주로 16x2 또는 20x4 크기의 LCD 디스플레이가 많이 사용됩니다. 본 문서는 I2C 통신이 가능한 LCD를 다룹니다. 일반적인 병렬 인터페이스 대신 I2C 인터페이스를 사용하면 핀 수를 줄이고 배선을 간소화할 수 있습니다. 아두이노 보드와 쉽게 연결하여 다양한 프로젝트에서 정보를 시각적으로 표현할 수 있습니다.
주요 사양
- 디스플레이 크기 : 16x2, 20x4가 많이 사용됩니다.
- 전원 공급 범위 : 5V (아두이노 보드에서 직접 공급)
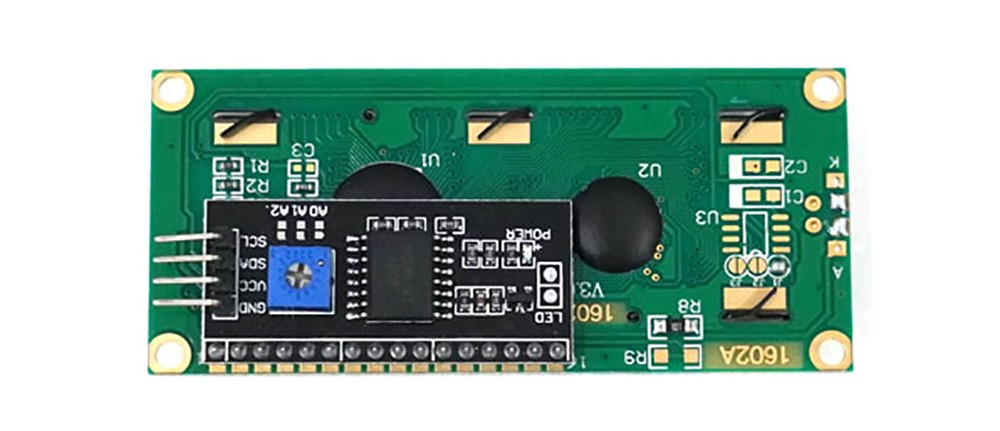
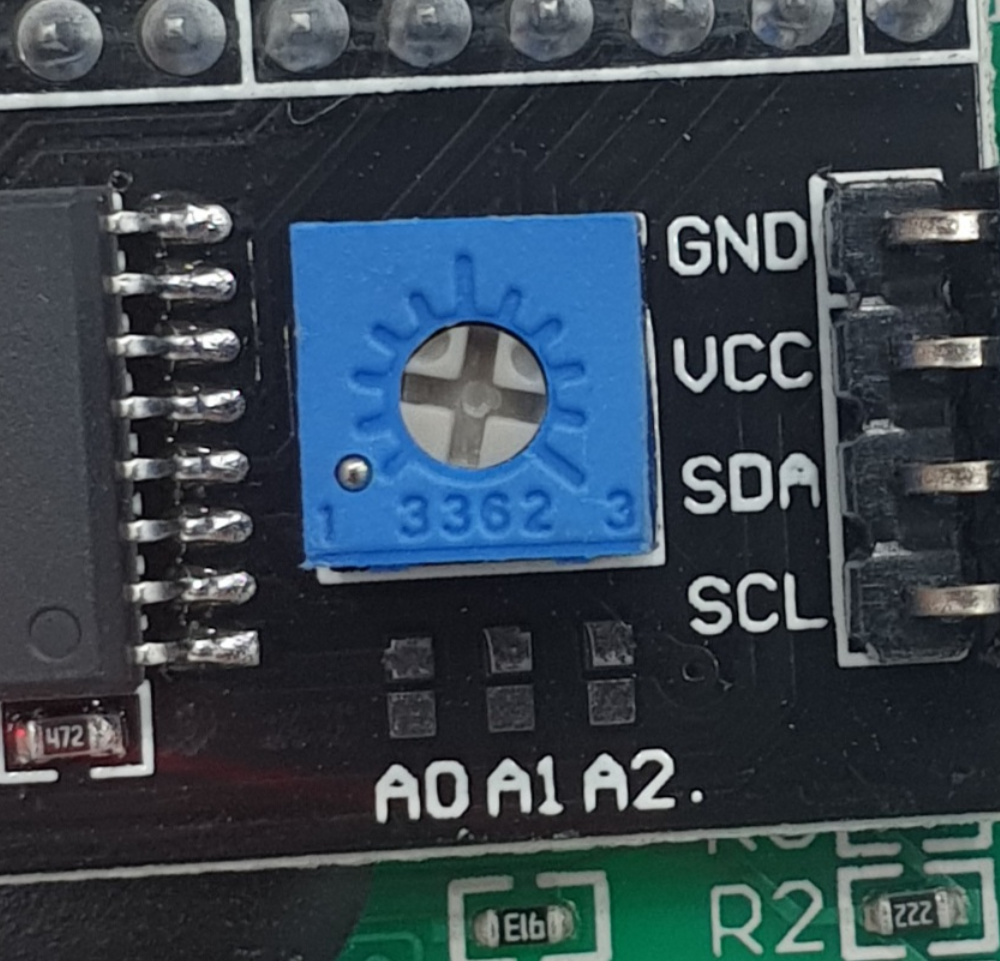
- 인터페이스 : I2C (SDA, SCL)
- 문자 세트 : ASCII 문자 세트 지원
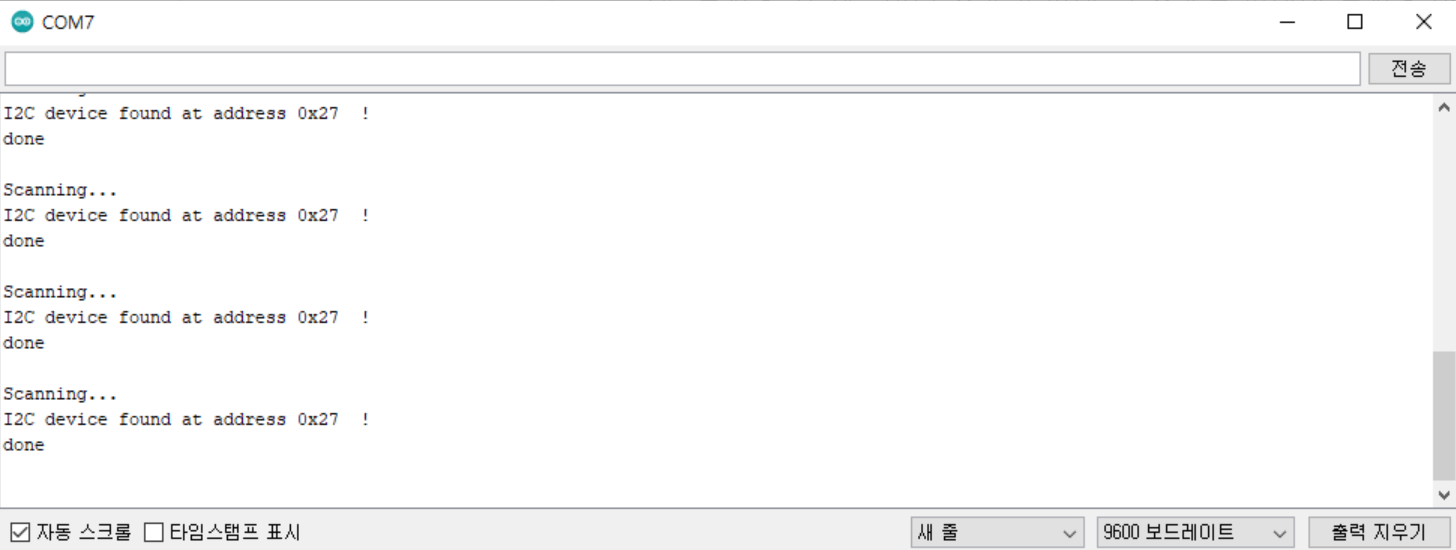
- I2C 주소 : 기본 0x27 또는 0x3F (모듈에 따라 다름)
기능
- 문자 디스플레이 : 알파벳, 숫자, 특수 문자를 표시할 수 있습니다. 도형이나 그래픽의 경우 매우 제한적이며 그래픽 LCD나 OLED가 더 적합합니다.
- 백라이트 제어 : 백라이트를 켜고 끌 수 있으며, 조도를 조절할 수 있습니다.
- 커서 제어 : setCursor()를 활용해 커서 위치를 이동하거나 숨길 수 있습니다.
- 스크롤 기능 : 텍스트를 좌우로 스크롤할 수 있습니다.
- 뒷 면에 가변저항이 있어 글자 밝기 조절이 가능합니다.
활용 예제
라이브러리
- Wire (기본 라이브러리이므로 설치할 필요 없습니다.)
- LiquidCrystal I2C : 라이브러리 설치방법 링크를 통해 설치 방법을 확인하세요.
연결
사이즈(16x2, 20x4)와 관계없이 동일합니다.
| I2C LCD 모듈 핀 | 아두이노 우노 핀 |
|---|---|
| VCC | 5V |
| GND | GND |
| SDA | A4 |
| SCL | A5 |
1. 모듈 주소 확인하기
1-1. 코드
#include <Wire.h>

void setup()
{
  Wire.begin();
  Serial.begin(9600);
  Serial.println("\nI2C Scanner");
}

void loop()
{
  byte error, address;
  int nDevices;
  Serial.println("Scanning...");
  nDevices = 0;
  for(address = 1; address < 127; address++ )
  {
    Wire.beginTransmission(address);
    error = Wire.endTransmission();
    if (error == 0)
    {
      Serial.print("I2C device found at address 0x");
      if (address<16)
        Serial.print("0");
      Serial.print(address,HEX);
      Serial.println("  !");
      nDevices++;
    }
    else if (error==4)
    {
      Serial.print("Unknow error at address 0x");
      if (address<16)
        Serial.print("0");
      Serial.println(address,HEX);
    }
  }
  if (nDevices == 0)
    Serial.println("No I2C devices found\n");
  else
    Serial.println("done\n");
  delay(5000);
}
1-2. 실행 결과
2. LCD에 텍스트 출력하기
2-2. 코드
#include <Wire.h>
#include <LiquidCrystal_I2C.h>
LiquidCrystal_I2C lcd(0x27, 16, 2);

void setup()
{
  //사용 전에 lcd를 초기화 해줍니다.
  lcd.init();

  //lcd의 백라이트를 작동합니다.
  lcd.backlight();

  //lcd의 위치를 (0,0)으로 지정합니다.(좌상단 기준)
  lcd.setCursor(0, 0);

  //출력할 문구를 작성합니다.
  lcd.print("Gongzipsa");

  //lcd의 위치를 (0,1)로 지정합니다.
  lcd.setCursor(0, 1);

  //val 값을 출력합니다.
  int val = 1004;
  lcd.print(val);
}

void loop(){}
2-2. 실행 결과
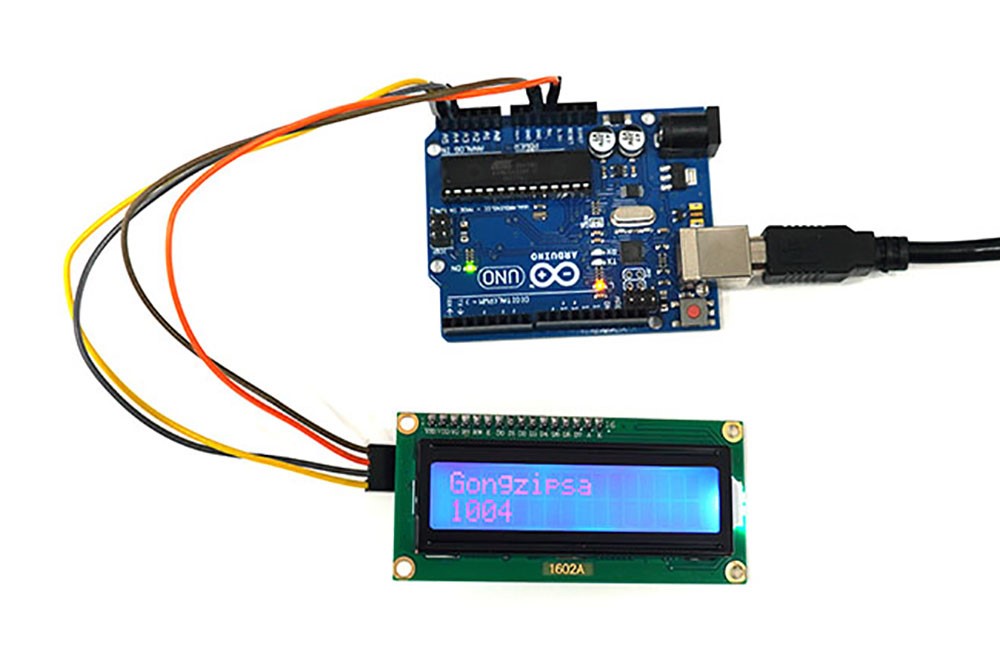 3.
3.
참고 문서
