Microphone Sound Sensor(KY-038): 두 판 사이의 차이
(Created page with "{{#seo:|title=아두위키 : 아두이노 소리 감지 센서(KY-038) 가이드|title_mode=append|keywords=아두이노, 정보과학, 메이커학습, 수행평가, 소리 감지 센서(KY-038), 아두이노 작품, 캡스톤작품, 아두이노 예제코드|description=아두이노로 소리 감지 센서(KY-038)를 제어하는 방법(기본정보, 회로, 예제 코드)을 소개합니다. 정보과학과 메이커수업에 활용가능합니다.}} File:소리감...") |
잔글편집 요약 없음 |
||
| 68번째 줄: | 68번째 줄: | ||
</syntaxhighlight> | </syntaxhighlight> | ||
=== Execution Result === | === Execution Result === | ||
<div class="coders70"> | |||
<youtube> Ja-vqIg21eQ </youtube> | |||
</div> | |||
2024년 7월 10일 (수) 14:07 판

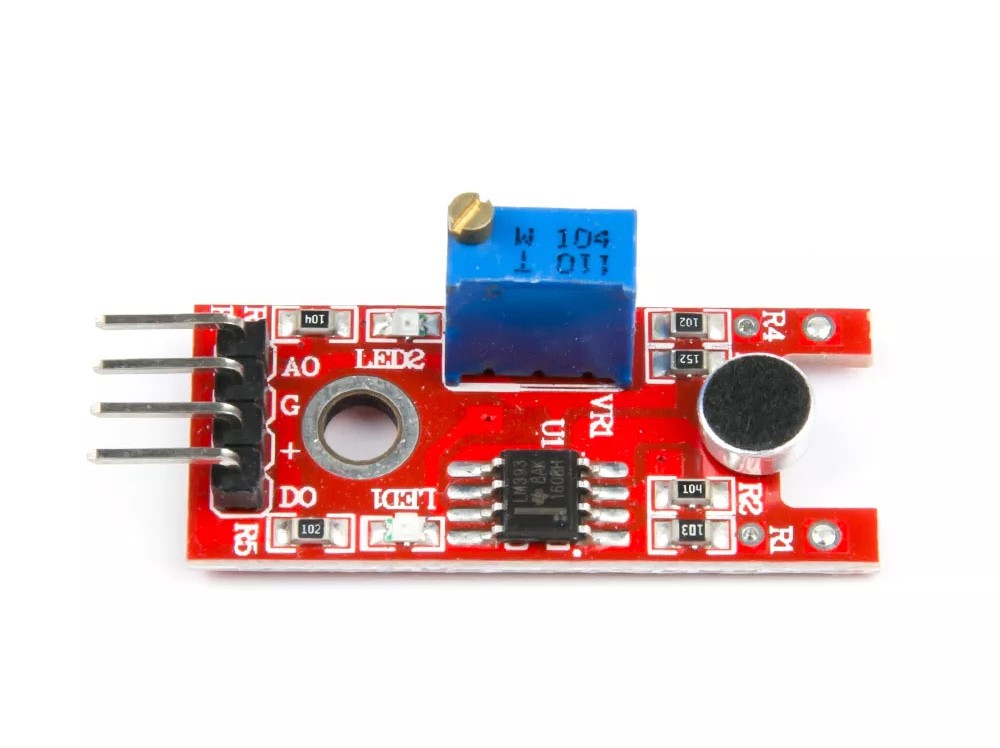
This module detects the intensity of sound and changes the output voltage according to the ambient sound level, outputting it as an analog signal.
It is similar to the KY-037 model.
Specifications
- Operating Voltage [V]: 3.3 ~ 5
- Frequency Range [Hz]: 50 ~ 20K
Example Usage Hardware
- Arduino board
- Jumper cables
- KY-038 Sound Detection Sensor
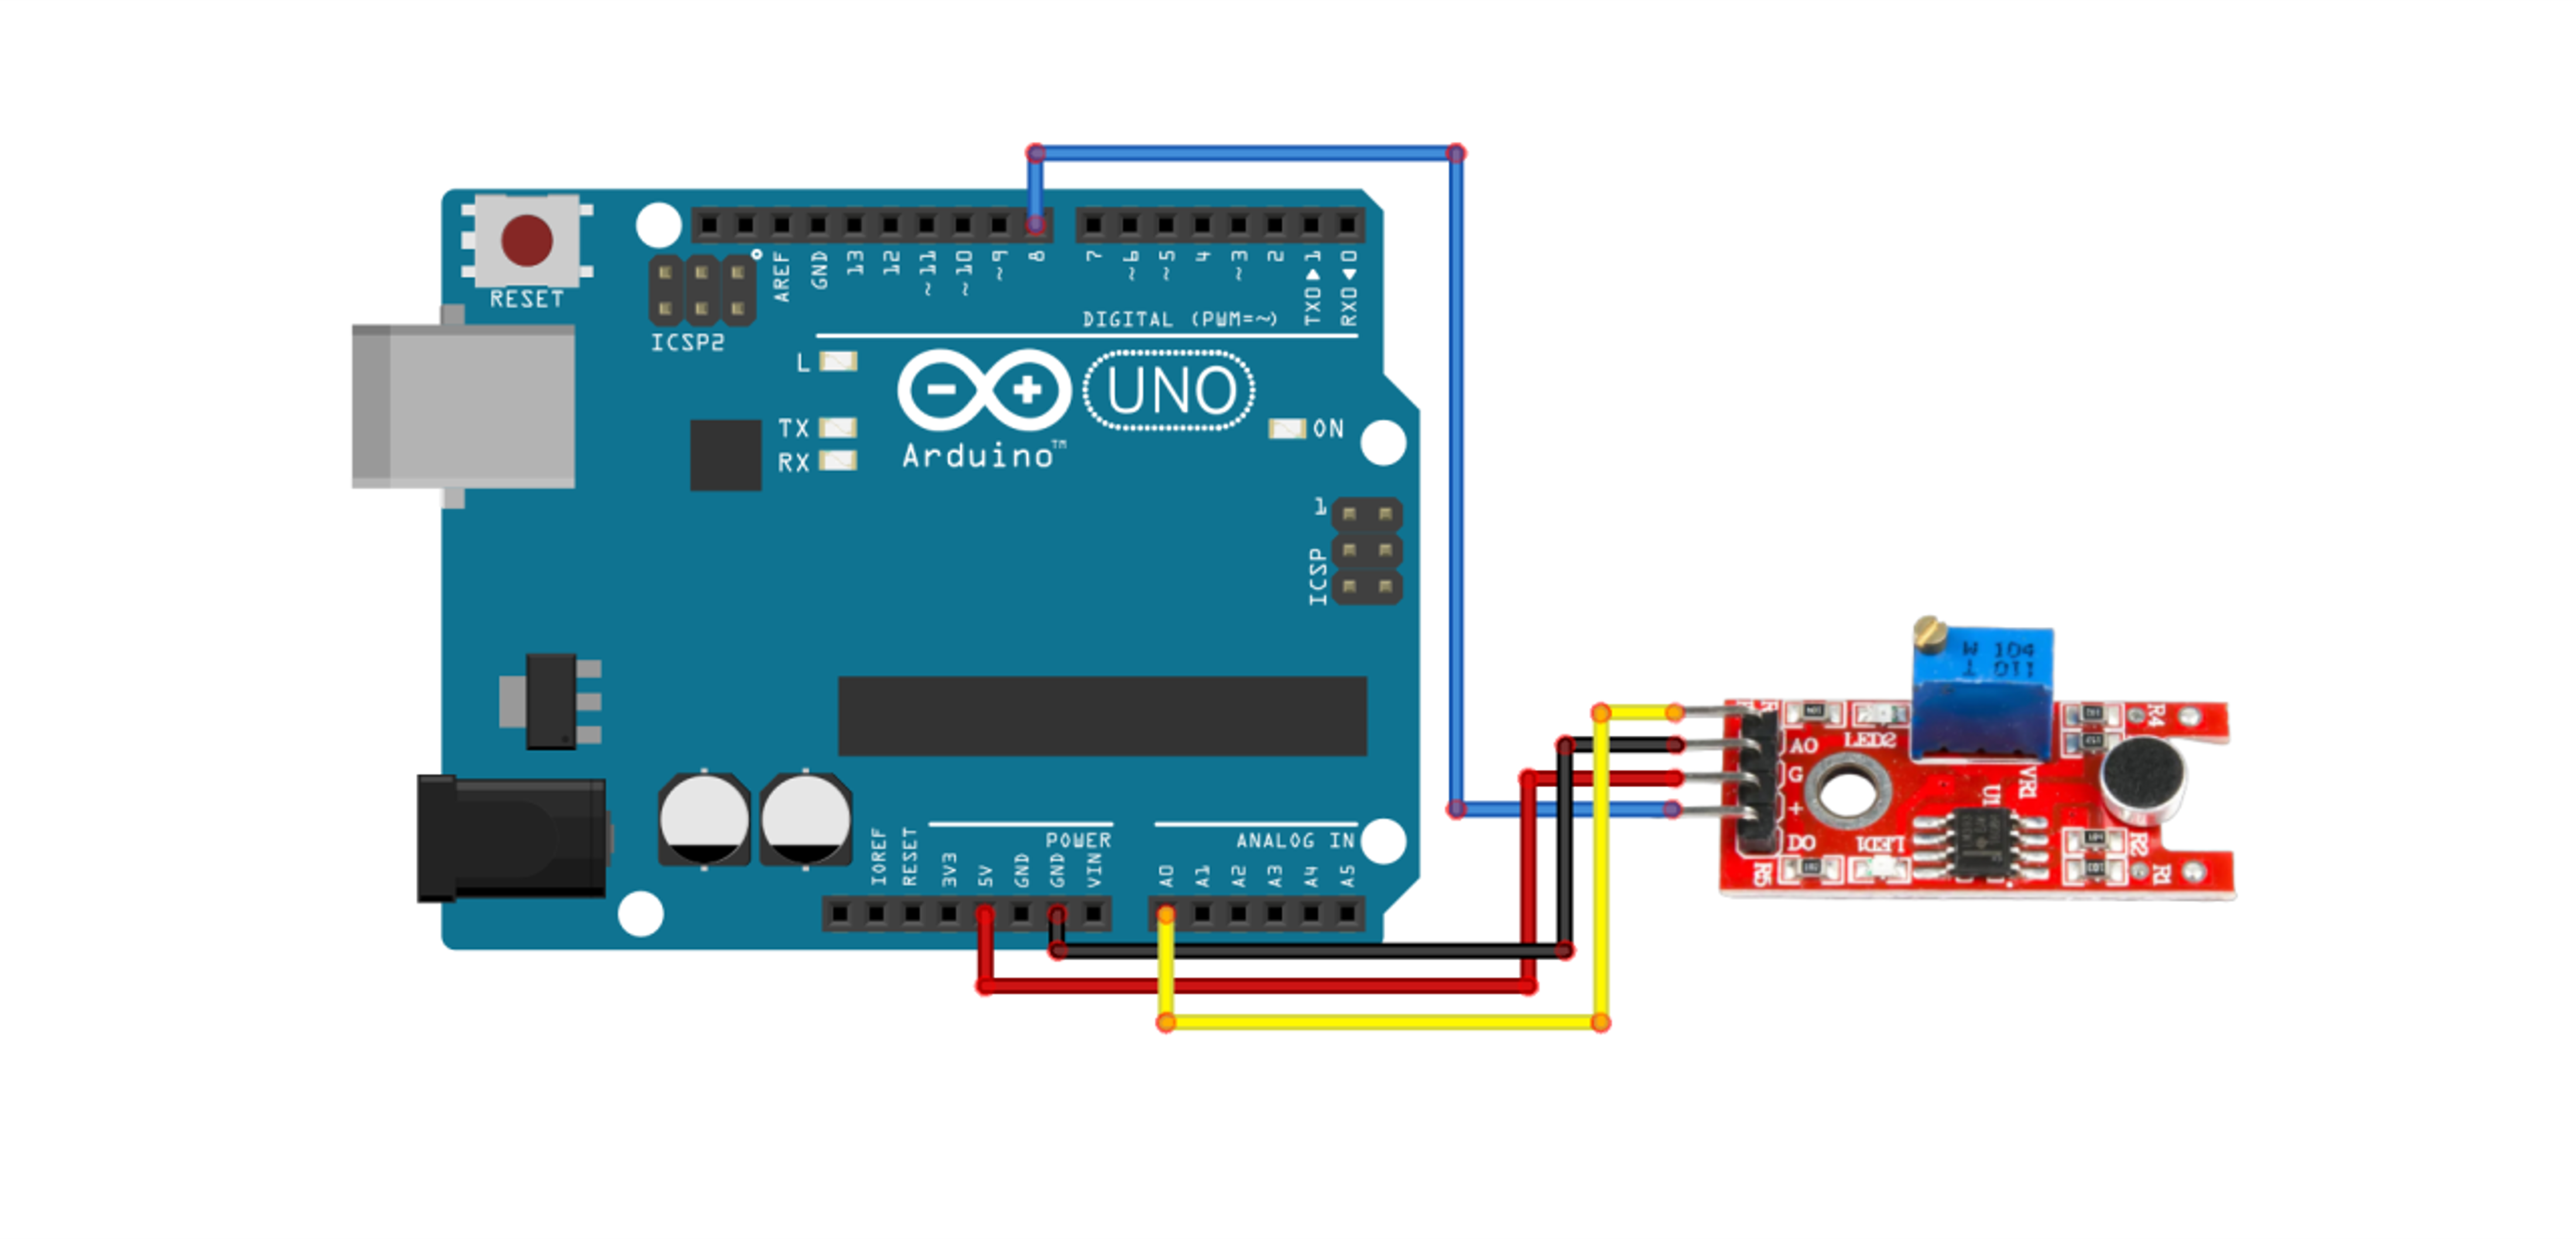
Connection
Although the digital pin is not used in this example, please refer to it as a connection example.
When using the KY-038 module digitally, supply power to the module in a quiet environment and then adjust the sensitivity by turning the variable resistor.
| Arduino Uno | KY-038 |
| 5V | + |
| GND | G |
| D8 | DO |
| A0 | AO |

Example Code
This example turns on the internal LED (pin 13) of the Arduino when sound is detected and then turns it off after a certain period.
int analogPin = A0;
int ledPin = 13;
int analogVal = 0;
long int past_time = 0;
int past_analogVal = 0;

void setup() {
  pinMode(analogPin, INPUT);
  pinMode(ledPin, OUTPUT);
  digitalWrite(ledPin, HIGH);
  Serial.begin(9600);
}

void loop() {
  analogVal = analogRead(analogPin);
  if (millis() - past_time > 1000) {
    if (abs(past_analogVal - analogVal) > 3) {
      digitalWrite(ledPin, !digitalRead(ledPin));
      past_analogVal = analogVal;
      past_time = millis();
    }
  }
  delay(10);
}
Execution Result