Proximity Sensor En: 두 판 사이의 차이
잔글편집 요약 없음 |
잔글 (→Serial Monitor) |
||
| 77번째 줄: | 77번째 줄: | ||
=== Serial Monitor === | |||
[[파일:금속근접센서 시리얼모니터.jpg|가운데|class=coders100]] | [[파일:금속근접센서 시리얼모니터.jpg|가운데|class=coders100]] | ||
2024년 8월 9일 (금) 11:13 판

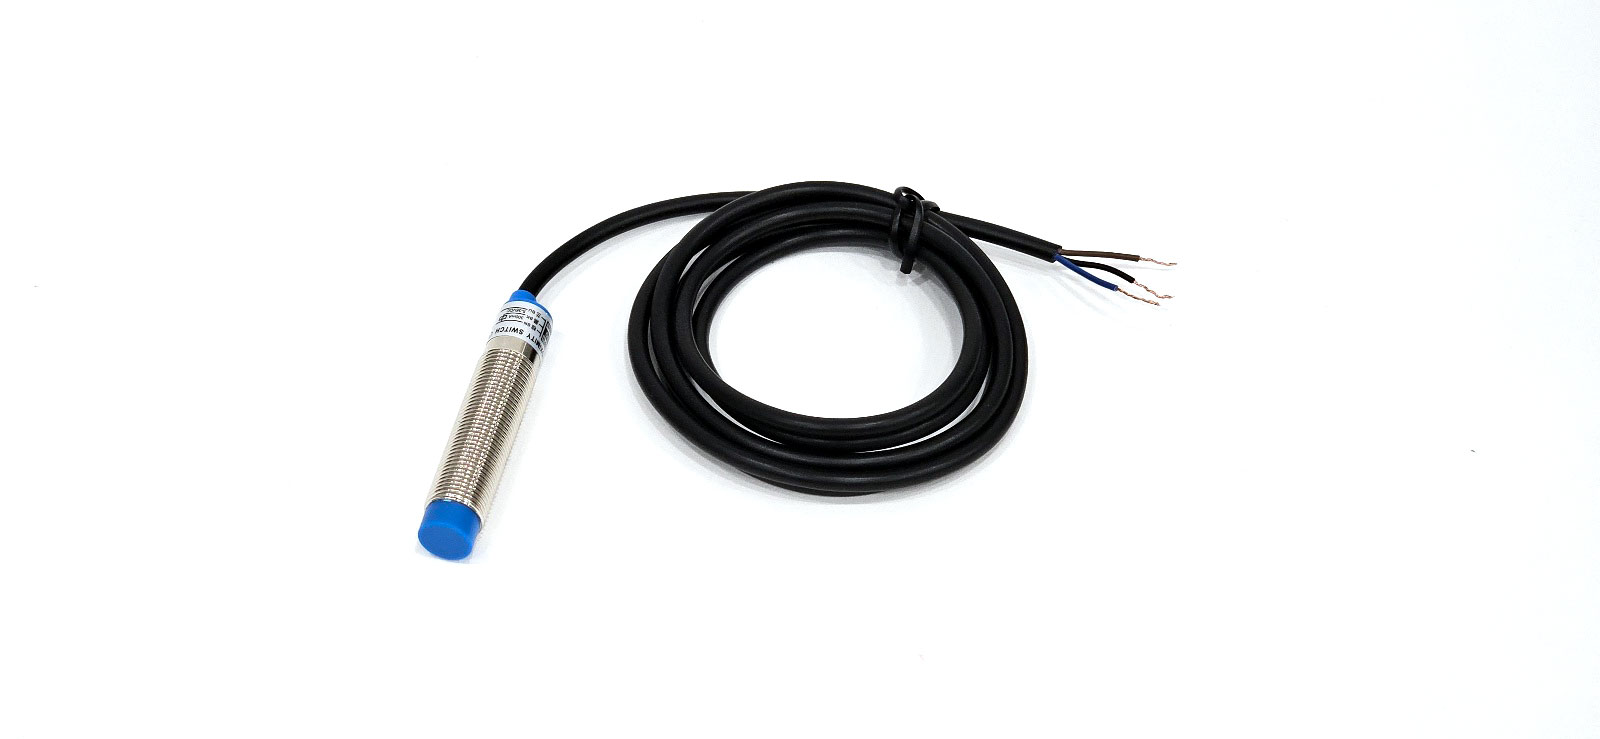
Inductive proximity sensors detect the presence or distance of metallic objects in a non-contact manner. They are mainly used in automation equipment, robotics, and various industrial applications. Ehlau inductive proximity sensors operate based on the principle of detecting metallic objects using a magnetic field.
Specifications
- Model Number: LJ12A3-4-Z/BX
- Sensor Type: Inductive Proximity Sensor
- Detection Distance: 4mm
- Output Type: NPN NO (Normally Open)
- Power Voltage: DC 6-36V
- Sensing Size: M12
- Cable Length: Approximately 1.2m
- Operating Temperature Range: -25°C to +70°C
- Response Time: ≤2.5ms
Features
- Non-contact Detection: Can detect without contact with objects, resulting in no wear and a longer lifespan.
- High Durability: Designed for use in various industrial environments.
- Easy Installation: M12-sized cylindrical design makes installation easy.
- Metal Object Detection: Can detect various metal objects such as iron, aluminum, and copper.
- Non-metal Object Detection Not Possible: Inductive proximity sensors use a magnetic field to detect metal objects, so they cannot detect non-metal objects like plastic, wood, or glass. For detecting non-metal objects, other types of sensors such as capacitive proximity sensors should be used.
Usage Examples
This is an example that displays the status on the serial monitor based on the detection of the metal proximity sensor and blinks the built-in LED on the Arduino.
The metal proximity sensor itself also has an LED that lights up when metal is detected.
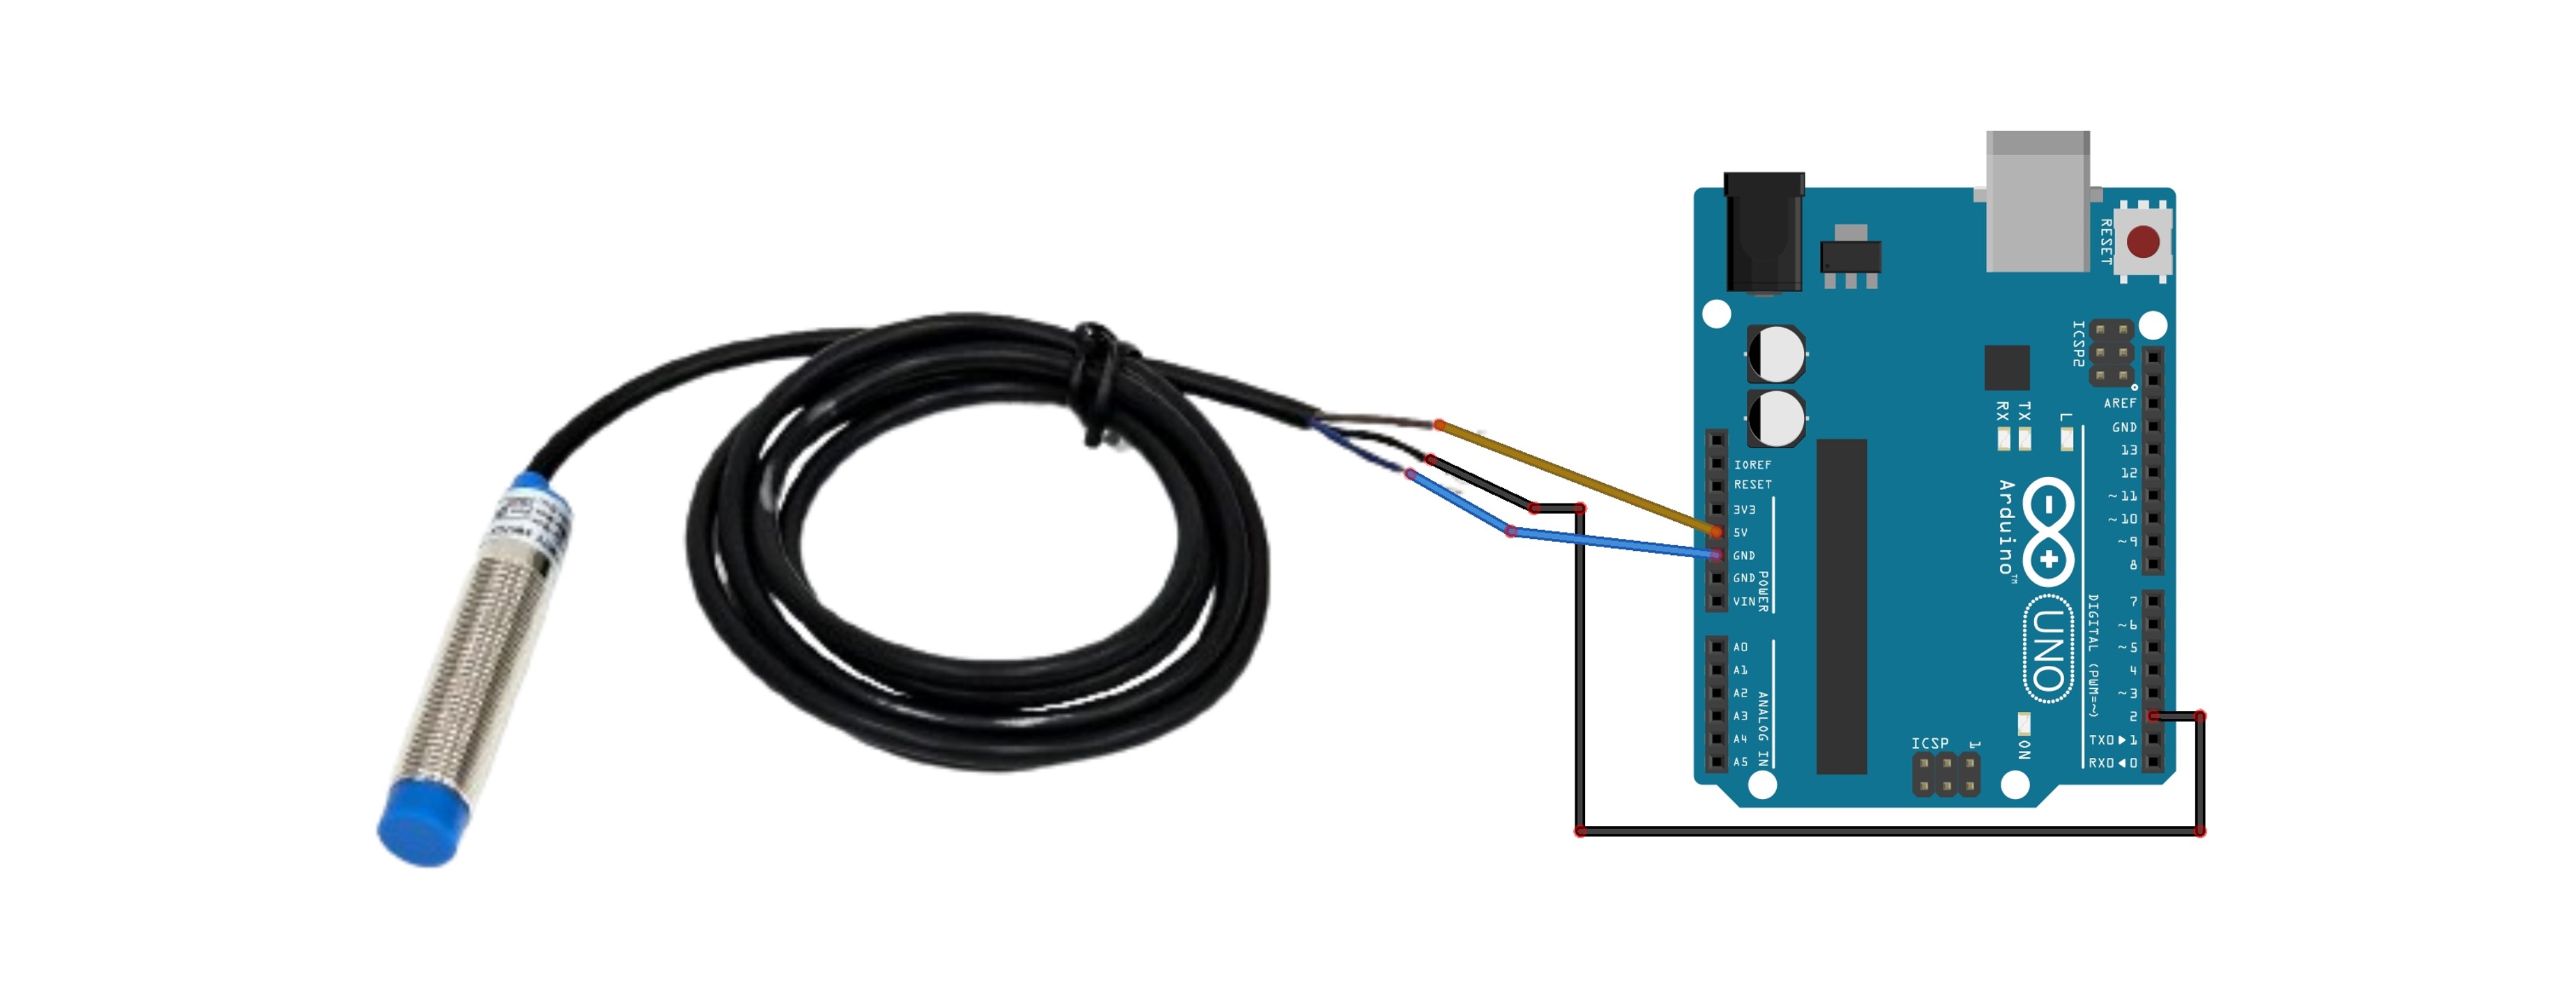
Circuit Configuration
1. Connect the brown wire to the 5V pin of the Arduino.
2. Connect the blue wire of the sensor to the GND pin of the Arduino.
3. Connect the black wire of the sensor to a digital input pin of the Arduino (in this example, D2).

Code
const int sensorPin = 2; // Connect the sensor's signal pin to D2.
const int ledPin = 13;   // Built-in LED Pin

void setup() {
  pinMode(sensorPin, INPUT_PULLUP); // Activate INPUT_PullUP Resistor
  pinMode(ledPin, OUTPUT);
  Serial.begin(9600);
}

void loop() {
  int sensorValue = digitalRead(sensorPin);
  Serial.println(sensorValue);

  if (sensorValue == LOW) {
    digitalWrite(ledPin, HIGH); // Turn on LED when object is detected
  } else {
    digitalWrite(ledPin, LOW); // Turn off LED when object is not detected
  }

  delay(100); // Wait for 0.1 second
}
Execution Result
The LED lights up when a metallic object approaches within 4mm, while it does not react to non-metallic objects.
Serial Monitor

응용 분야
- Automated Equipment: Detects the position or presence of objects to perform automated tasks.
- Robotics: Used for position detection and obstacle avoidance systems in robots.
- Industrial Machinery: Used to detect and control the operating status of machines.
- Logistics Systems: Detects and controls the flow of objects in logistics conveyor systems.