LCD(Liquid Crystal Display) En: 두 판 사이의 차이
편집 요약 없음 |
잔글편집 요약 없음 |
||
| (같은 사용자의 중간 판 7개는 보이지 않습니다) | |||
| 1번째 줄: | 1번째 줄: | ||
{{#seo:|title=Arduwiki : Arduino LCD Guide|title_mode=append|keywords=Arduino, Information Science, Maker Learning, Performance Assessment, LCD, Arduino Project, Capstone Project, Arduino Example Code|description=This introduces how to control a LCD with Arduino (basic information, circuit, example code). It can be used in Information Science and Maker classes.}} | |||
[[파일:1602LCDimg1.jpg|class=coders100]] | |||
[[파일:1602LCDimg2.jpg|class=coders100]] | |||
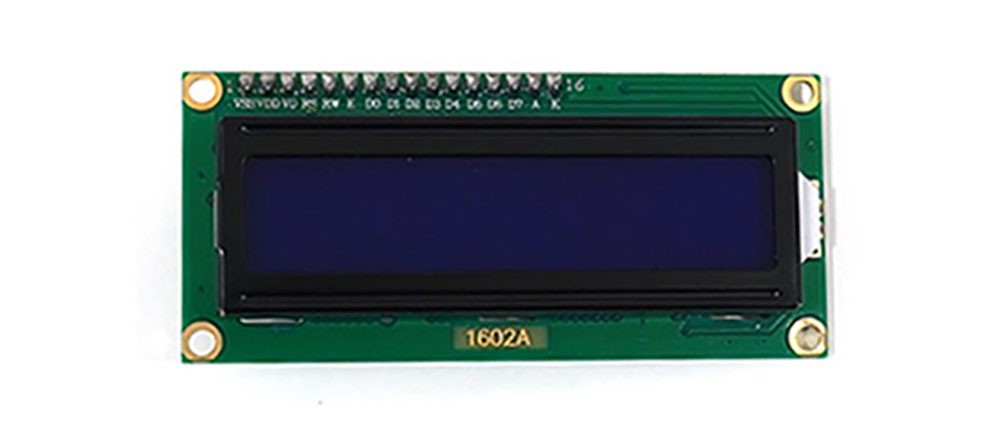
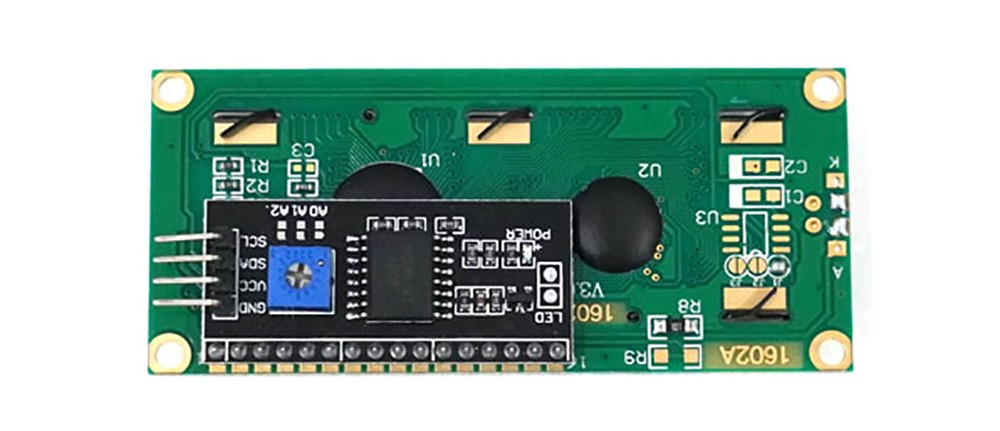
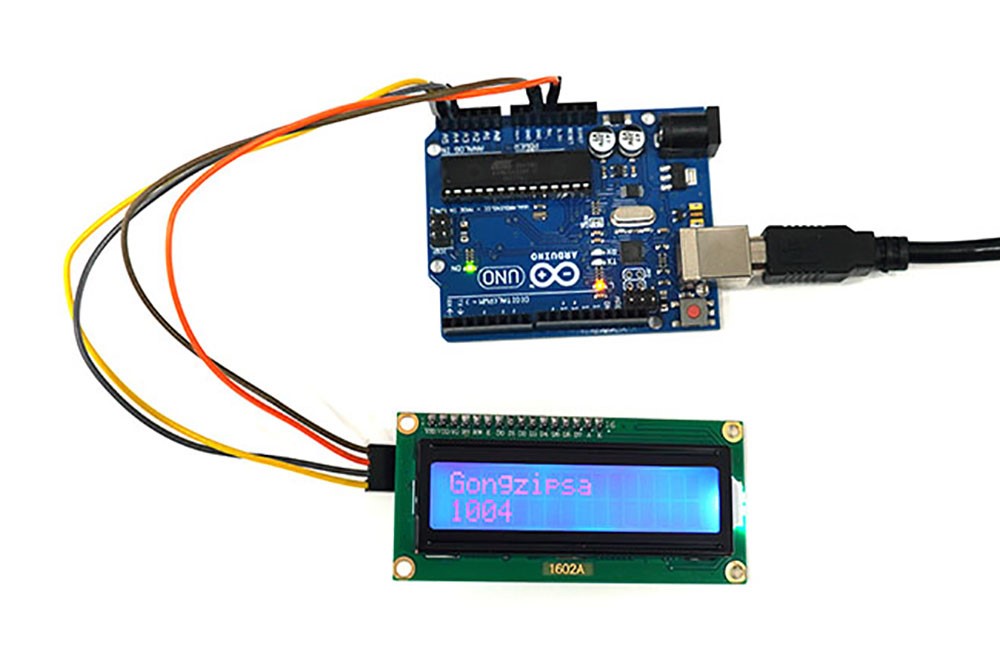
The Arduino LCD module is used to display characters or numbers, with 16x2 or 20x4 sized LCD displays being commonly used. This document covers LCDs that support I2C communication. Using the I2C interface instead of a typical parallel interface reduces the number of pins required and simplifies wiring. It can be easily connected to an Arduino board to visually represent information in various projects. | |||
== | == '''Main Specifications''' == | ||
* | * '''Display Size''': Commonly used sizes are 16x2 and 20x4. | ||
* | * '''Power Supply Range''': 5V (supplied directly from the Arduino board) | ||
* '''Interface''': I2C (SDA, SCL) | |||
* '''Character Set''': Supports ASCII character set | |||
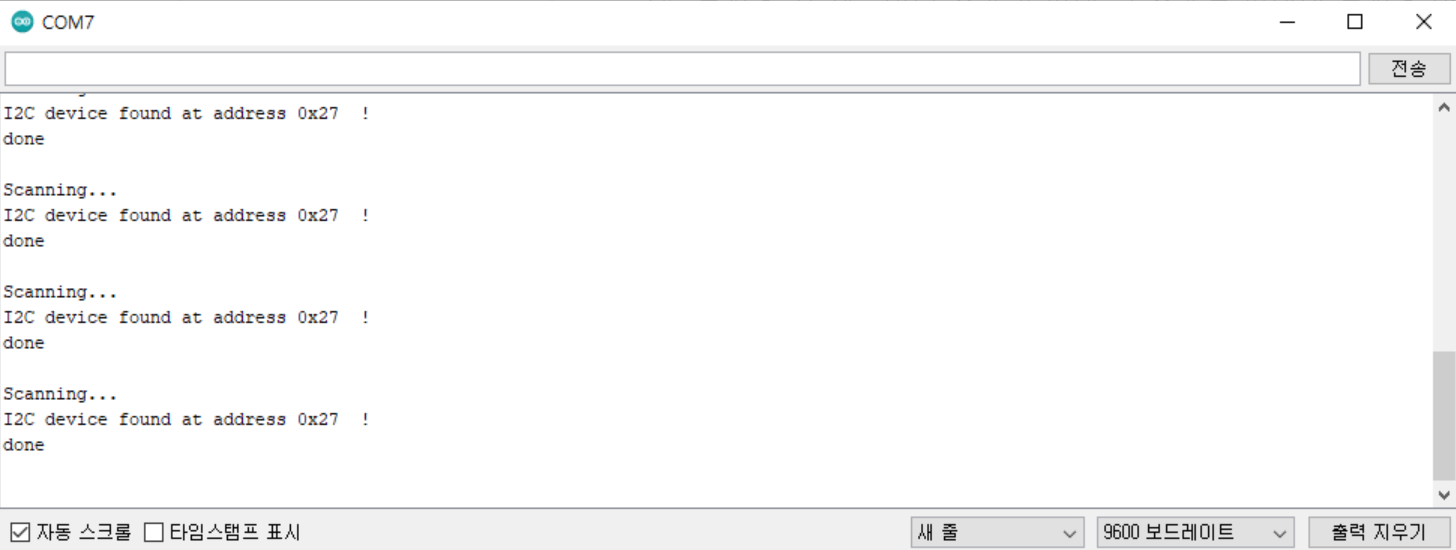
* '''I2C Address''': Default is 0x27 or 0x3F (varies by module) | |||
== | |||
== '''Features''' == | |||
* '''Character Display''': Can display alphabets, numbers, and special characters. For shapes or graphics, the capability is very limited, and graphic LCDs or OLEDs are more suitable. | |||
* '''Backlight Control''': The backlight can be turned on and off, and brightness can be adjusted. | |||
* '''Cursor Control''': The cursor position can be moved or hidden using setCursor(). | |||
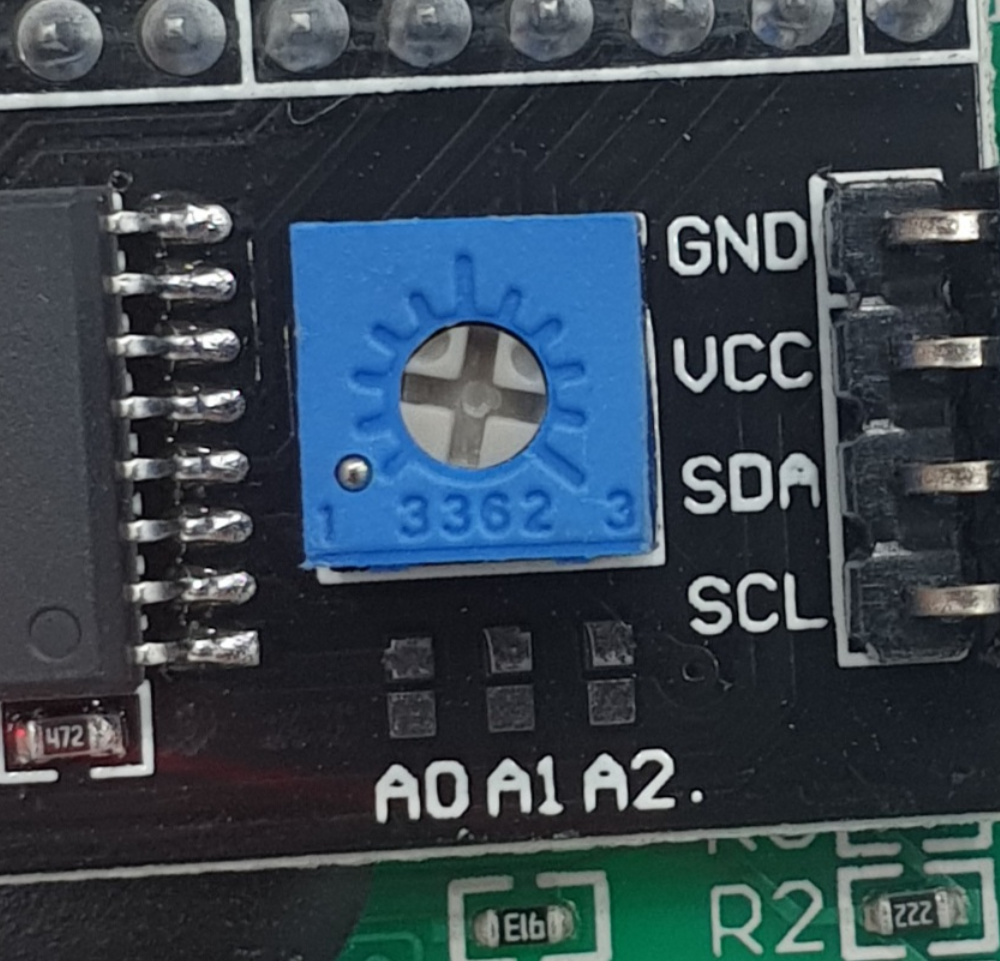
* '''Scroll Function''': Text can scroll left and right. There is a variable resistor on the back for adjusting the brightness of the text. | |||
[[파일:LCD1602 가변저항.png|class=coders50]] | |||
== '''Usage Examples''' == | |||
=== '''Library''' === | |||
* Wire (This is a basic library, so no installation is needed.) | |||
*LiquidCrystal I2C : [https://arduwiki.com/wiki/아두이노_라이브러리 라이브러리 설치방법] Check the installation method through the link. | |||
=== '''연결''' === | |||
It is the same regardless of size (16x2, 20x4). | |||
{| class="wikitable" | {| class="wikitable" | ||
!I2C LCD Module Pin | |||
! | !Arduino Uno Pin | ||
! | |- | ||
|VCC | |||
|5V | |||
|- | |- | ||
|GND | |GND | ||
|GND | |GND | ||
|- | |- | ||
|SDA | |SDA | ||
| 35번째 줄: | 53번째 줄: | ||
|A5 | |A5 | ||
|} | |} | ||
[[ | [[파일:LCD1602 회로.png|class=coders100]] | ||
== | |||
=== '''1. Checking the Module Address''' === | |||
==== 1-1. Code ==== | |||
<syntaxhighlight lang="c++" line="1"> | |||
#include <Wire.h> | #include <Wire.h> | ||
void setup() | void setup() | ||
{ | { | ||
Wire.begin(); | |||
Serial.begin(9600); | |||
Serial.println("\nI2C Scanner"); | |||
} | |||
void loop() | |||
{ | |||
byte error, address; | |||
int nDevices; | |||
Serial.println("Scanning..."); | |||
nDevices = 0; | |||
for(address = 1; address < 127; address++ ) | |||
{ | |||
Wire.beginTransmission(address); | |||
error = Wire.endTransmission(); | |||
if (error == 0) | |||
{ | |||
Serial.print("I2C device found at address 0x"); | |||
if (address<16) | |||
Serial.print("0"); | |||
Serial.print(address,HEX); | |||
Serial.println(" !"); | |||
nDevices++; | |||
} | |||
else if (error==4) | |||
{ | |||
Serial.print("Unknow error at address 0x"); | |||
if (address<16) | |||
Serial.print("0"); | |||
Serial.println(address,HEX); | |||
} | |||
} | |||
if (nDevices == 0) | |||
Serial.println("No I2C devices found\n"); | |||
else | |||
Serial.println("done\n"); | |||
delay(5000); | |||
} | |||
</syntaxhighlight> | |||
===== 1-2. Execution Result ===== | |||
[[파일:LCD1602 주소 확인.png|class=coders100]] | |||
==== 2. Displaying Text on the LCD ==== | |||
==== 2-2. Code ==== | |||
<syntaxhighlight lang="c++" line="1"> | |||
== | |||
<syntaxhighlight lang=" | |||
#include <Wire.h> | #include <Wire.h> | ||
#include <LiquidCrystal_I2C.h> | #include <LiquidCrystal_I2C.h> | ||
| 77번째 줄: | 119번째 줄: | ||
void setup() | void setup() | ||
{ | { | ||
// Initialize the LCD before use | // Initialize the LCD before use | ||
lcd.init(); | lcd.init(); | ||
// Turn on the LCD backlight | // Turn on the LCD's backlight | ||
lcd.backlight(); | lcd.backlight(); | ||
// Set the | // Set the cursor position to (0,0) (top-left corner) | ||
lcd.setCursor(0, 0); | lcd.setCursor(0, 0); | ||
// Write the text to | // Write the text to be displayed | ||
lcd.print("Gongzipsa"); | lcd.print("Gongzipsa"); | ||
// | // Set the cursor position to (0,1) | ||
lcd.setCursor(0, 1); | lcd.setCursor(0, 1); | ||
// | // Output the val value | ||
int val = 1004; | int val = 1004; | ||
lcd.print(val); | lcd.print(val); | ||
| 98번째 줄: | 140번째 줄: | ||
void loop(){} | void loop(){} | ||
</syntaxhighlight> | |||
=== | ==== 2-2. Execution Result ==== | ||
[[ | [[파일:LCD1602 예제.jpg|class=coders100]] | ||
== | == '''Reference Document''' == | ||
[https://docs.arduino.cc/learn/electronics/lcd-displays/ Arduino LCD Doc] | |||
[ | |||
2025년 3월 19일 (수) 20:37 기준 최신판
The Arduino LCD module is used to display characters or numbers, with 16x2 or 20x4 sized LCD displays being commonly used. This document covers LCDs that support I2C communication. Using the I2C interface instead of a typical parallel interface reduces the number of pins required and simplifies wiring. It can be easily connected to an Arduino board to visually represent information in various projects.
Main Specifications
- Display Size: Commonly used sizes are 16x2 and 20x4.
- Power Supply Range: 5V (supplied directly from the Arduino board)
- Interface: I2C (SDA, SCL)
- Character Set: Supports ASCII character set
- I2C Address: Default is 0x27 or 0x3F (varies by module)
Features
- Character Display: Can display alphabets, numbers, and special characters. For shapes or graphics, the capability is very limited, and graphic LCDs or OLEDs are more suitable.
- Backlight Control: The backlight can be turned on and off, and brightness can be adjusted.
- Cursor Control: The cursor position can be moved or hidden using setCursor().
- Scroll Function: Text can scroll left and right. There is a variable resistor on the back for adjusting the brightness of the text.
Usage Examples
Library
- Wire (This is a basic library, so no installation is needed.)
- LiquidCrystal I2C : 라이브러리 설치방법 Check the installation method through the link.
연결
It is the same regardless of size (16x2, 20x4).
| I2C LCD Module Pin | Arduino Uno Pin |
|---|---|
| VCC | 5V |
| GND | GND |
| SDA | A4 |
| SCL | A5 |
1. Checking the Module Address
1-1. Code
#include <Wire.h>

void setup()
{
  Wire.begin();
  Serial.begin(9600);
  Serial.println("\nI2C Scanner");
}

void loop()
{
  byte error, address;
  int nDevices;
  Serial.println("Scanning...");
  nDevices = 0;
  for(address = 1; address < 127; address++ )
  {
    Wire.beginTransmission(address);
    error = Wire.endTransmission();
    if (error == 0)
    {
      Serial.print("I2C device found at address 0x");
      if (address<16)
        Serial.print("0");
      Serial.print(address,HEX);
      Serial.println("  !");
      nDevices++;
    }
    else if (error==4)
    {
      Serial.print("Unknow error at address 0x");
      if (address<16)
        Serial.print("0");
      Serial.println(address,HEX);
    }
  }
  if (nDevices == 0)
    Serial.println("No I2C devices found\n");
  else
    Serial.println("done\n");
  delay(5000);
}
1-2. Execution Result
2. Displaying Text on the LCD
2-2. Code
#include <Wire.h>
#include <LiquidCrystal_I2C.h>
LiquidCrystal_I2C lcd(0x27, 16, 2);

void setup()
{
  // Initialize the LCD before use
  lcd.init();

  // Turn on the LCD's backlight
  lcd.backlight();

  // Set the cursor position to (0,0) (top-left corner)
  lcd.setCursor(0, 0);

  // Write the text to be displayed
  lcd.print("Gongzipsa");

  // Set the cursor position to (0,1)
  lcd.setCursor(0, 1);

  // Output the val value
  int val = 1004;
  lcd.print(val);
}

void loop(){}
