Sound Detection Sensor(LM393): 두 판 사이의 차이
(Created page with "{{#seo:|title=아두위키 : 아두이노 소리 감지 센서(LM393) 가이드|title_mode=append|keywords=아두이노, 정보과학, 메이커학습, 수행평가, 소리 감지 센서(LM393), 아두이노 작품, 캡스톤작품, 아두이노 예제코드|description=아두이노로 소리 감지 센서(LM393)를 제어하는 방법(기본정보, 회로, 예제 코드)을 소개합니다. 정보과학과 메이커수업에 활용가능합니다.}} File:소리감지...") |
|||
| (같은 사용자의 중간 판 4개는 보이지 않습니다) | |||
| 1번째 줄: | 1번째 줄: | ||
{{#seo:|title= | {{#seo:|title=ArduWiki: Arduino Sound Detection Sensor (LM393) Guide|title_mode=append|keywords=Arduino, Computer Science, Maker Learning, Project Assessment, Sound Detection Sensor (LM393), Arduino Project, Capstone Project, Arduino Example Code|description=How to control the sound detection sensor (LM393) using Arduino (basic info, circuit, example code). Useful for CS and maker classes.}} | ||
[[ | [[파일:소리감지센서3핀.jpg|center|class=coders100]] | ||
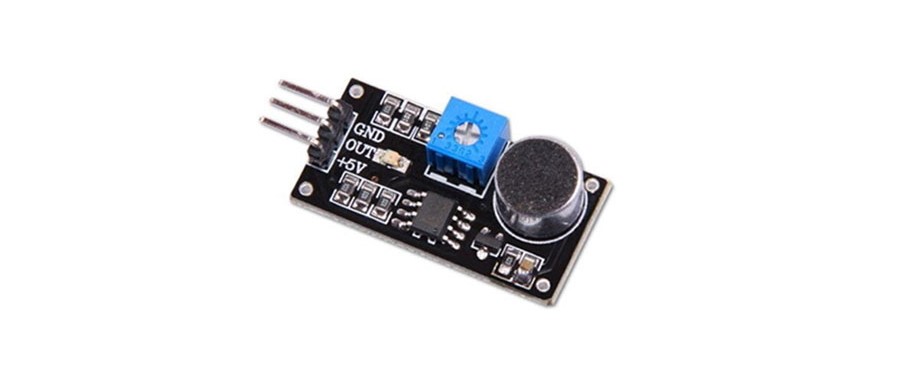
This sensor utilizes a microphone to detect ambient sound. | This sensor utilizes a microphone to detect ambient sound. | ||
| 8번째 줄: | 9번째 줄: | ||
* Digital output | * Digital output | ||
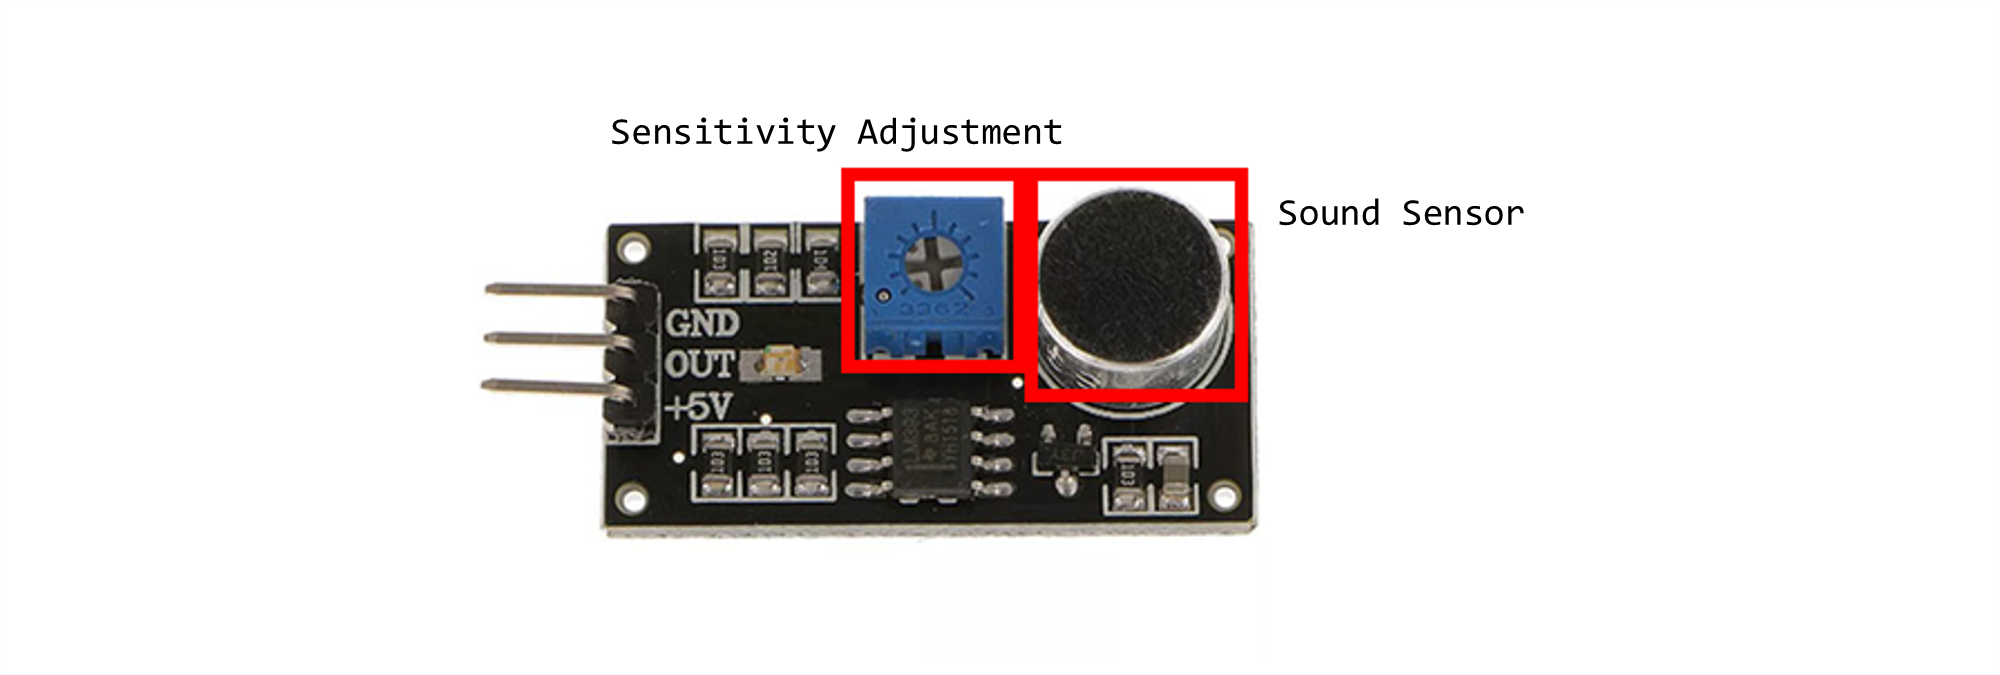
* Sensitivity adjustable via a variable resistor | * Sensitivity adjustable via a variable resistor | ||
[[File:Sound Detection Sensor.png|center|class=coders100]] | |||
[[File: | |||
== '''Example Required Hardware''' == | == '''Example Required Hardware''' == | ||
| 16번째 줄: | 16번째 줄: | ||
* Jumper cables | * Jumper cables | ||
* Sound detection module | * Sound detection module | ||
* LED | * [[LED 5mm EN|LED]] | ||
* 330 ohm resistor | * 330 ohm resistor | ||
| 74번째 줄: | 74번째 줄: | ||
=== Execution Result === | === Execution Result === | ||
<div class="coders70"> | |||
<youtube> dfLBgC5YEhk </youtube> | |||
</div> | |||
2025년 3월 27일 (목) 18:19 기준 최신판

This sensor utilizes a microphone to detect ambient sound.
Specifications
- Operating Voltage: 4V ~ 6V
- Digital output
- Sensitivity adjustable via a variable resistor

Example Required Hardware
- Arduino board
- Jumper cables
- Sound detection module
- LED
- 330 ohm resistor
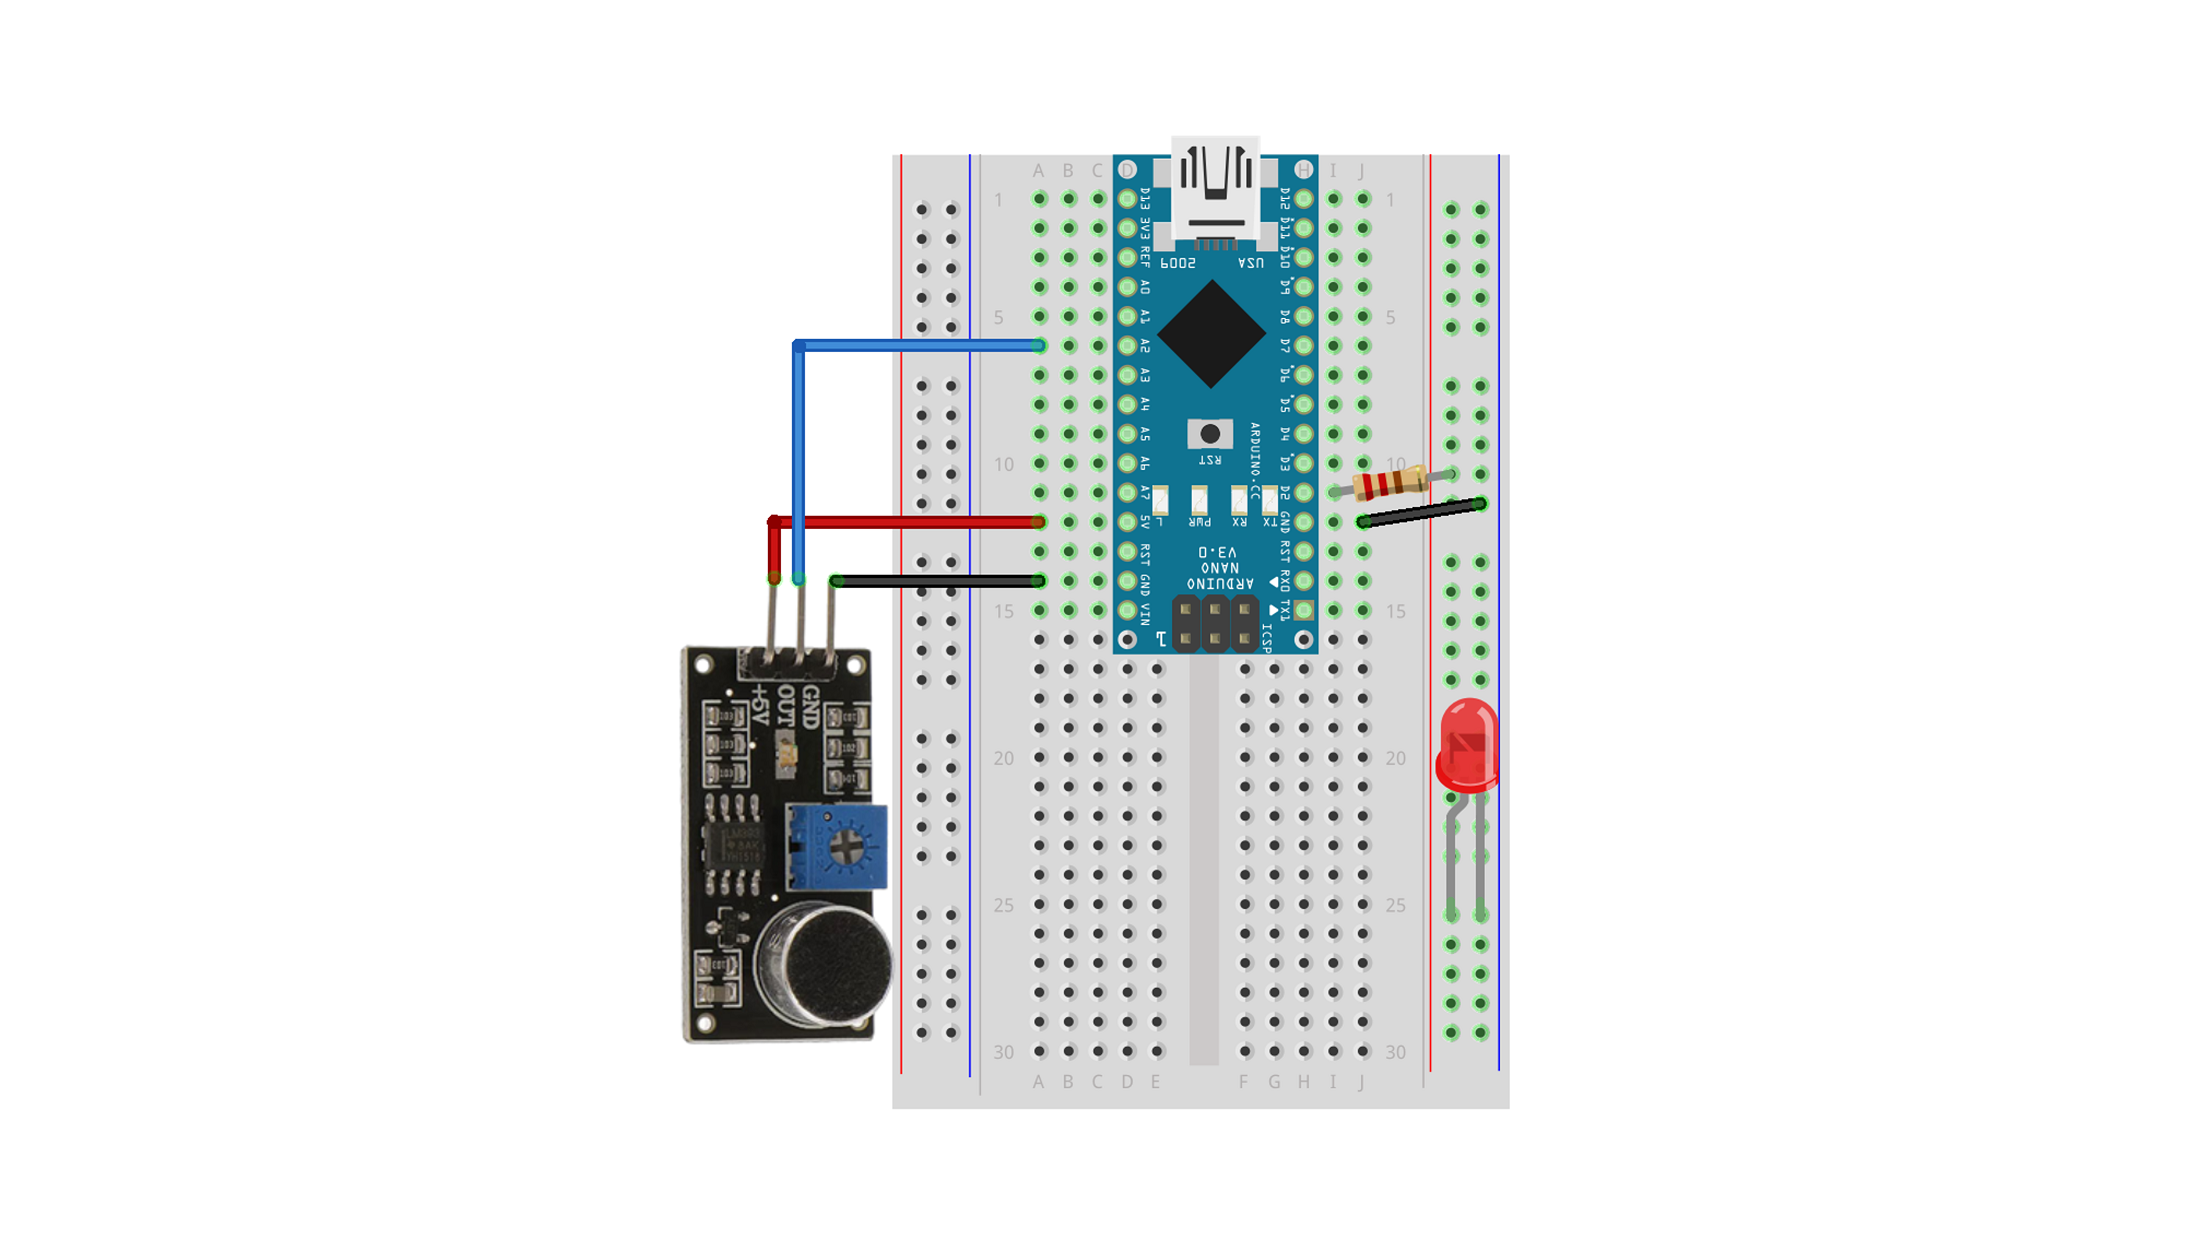
Connection
| Arduino | Sound Detection Module | LED | Resistor |
| 5V | 5V | ||
| GND | GND | K | |
| A2 | OUT | ||
| D2 | connected | ||
| A | connected |

Example Code
This example toggles an LED ON/OFF when sound is detected.
const int soundPin = A2;
const int LED = 2;

void setup() {
  pinMode(LED, OUTPUT);
  pinMode(soundPin, INPUT);
  digitalWrite(LED, LOW);
}

void loop() {
  if (digitalRead(soundPin) == HIGH) {
    digitalWrite(LED, !(digitalRead(LED)));
    delay(100);
  }
}
Execution Result