HM-10 Bluetooth Module: 두 판 사이의 차이
잔글 (→Operation Check) |
잔글편집 요약 없음 |
||
| (같은 사용자의 중간 판 5개는 보이지 않습니다) | |||
| 1번째 줄: | 1번째 줄: | ||
{{#seo:|title=ArduWiki: Arduino HM-10 Bluetooth Module Guide|title_mode=append|keywords=Arduino, Information Science, Maker Learning, Performance Evaluation, HM-10 Bluetooth Module, Arduino Projects, Capstone Projects, Arduino Example Code|description=Introduces how to control the HM-10 Bluetooth module with Arduino (basic information, circuit, example code). Can be used in Information Science and Maker classes.}} | |||
[[File:HM10대표이미지1.jpg|center|class=coders100]] | [[File:HM10대표이미지1.jpg|center|class=coders100]] | ||
| 7번째 줄: | 7번째 줄: | ||
It can also be used as a beacon. | It can also be used as a beacon. | ||
== Specifications == | == '''Specifications''' == | ||
* Operating Voltage: 5V | * Operating Voltage: 5V | ||
| 14번째 줄: | 14번째 줄: | ||
* Default Baud Rate (Serial Connection): 9600 | * Default Baud Rate (Serial Connection): 9600 | ||
== Required Hardware == | == '''Required Hardware''' == | ||
* HM-10 | * HM-10 | ||
| 21번째 줄: | 21번째 줄: | ||
* F-M Cable (4 pieces) | * F-M Cable (4 pieces) | ||
== Connection == | == '''Connection''' == | ||
TXD and RXD can be connected to any digital pin on the UNO board as desired (in this text, D6 and D7 are used). | TXD and RXD can be connected to any digital pin on the UNO board as desired (in this text, D6 and D7 are used). | ||
{| class="wikitable" | {| class="wikitable" | ||
| 44번째 줄: | 44번째 줄: | ||
== Library == | == '''Library''' == | ||
SoftwareSerial (default library) | SoftwareSerial (default library) | ||
== AT Command == | == '''AT Command''' == | ||
* The Bluetooth status can be checked using AT commands. | * The Bluetooth status can be checked using AT commands. | ||
| 55번째 줄: | 55번째 줄: | ||
== Example Code == | == '''Example Code''' == | ||
<syntaxhighlight lang="cpp" line="1"> | <syntaxhighlight lang="cpp" line="1"> | ||
// Include the library for serial communication | // Include the library for serial communication | ||
| 95번째 줄: | 95번째 줄: | ||
If OK is displayed, the module is functioning correctly. | If OK is displayed, the module is functioning correctly. | ||
[[File:HM-10 동작확인.png|center|class= | [[File:HM-10 동작확인.png|center|class=coders50]] | ||
=== Bluetooth Terminal Application Test === | === Bluetooth Terminal Application Test === | ||
| 104번째 줄: | 105번째 줄: | ||
[[File:터미널 테스트.png|center|class=coders100]] | [[File:터미널 테스트.png|center|class=coders100]] | ||
2025년 3월 20일 (목) 19:47 기준 최신판

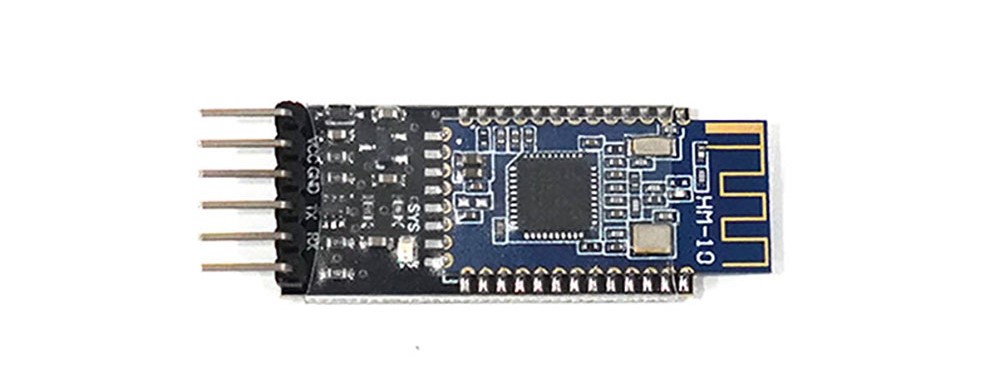
This module is equipped with Bluetooth functionality.
It can also be used as a beacon.
Specifications
- Operating Voltage: 5V
- Bluetooth Version: 4.0
- Default Name: HMSoft
- Default Baud Rate (Serial Connection): 9600
Required Hardware
- HM-10
- Arduino UNO
- UNO Cable
- F-M Cable (4 pieces)
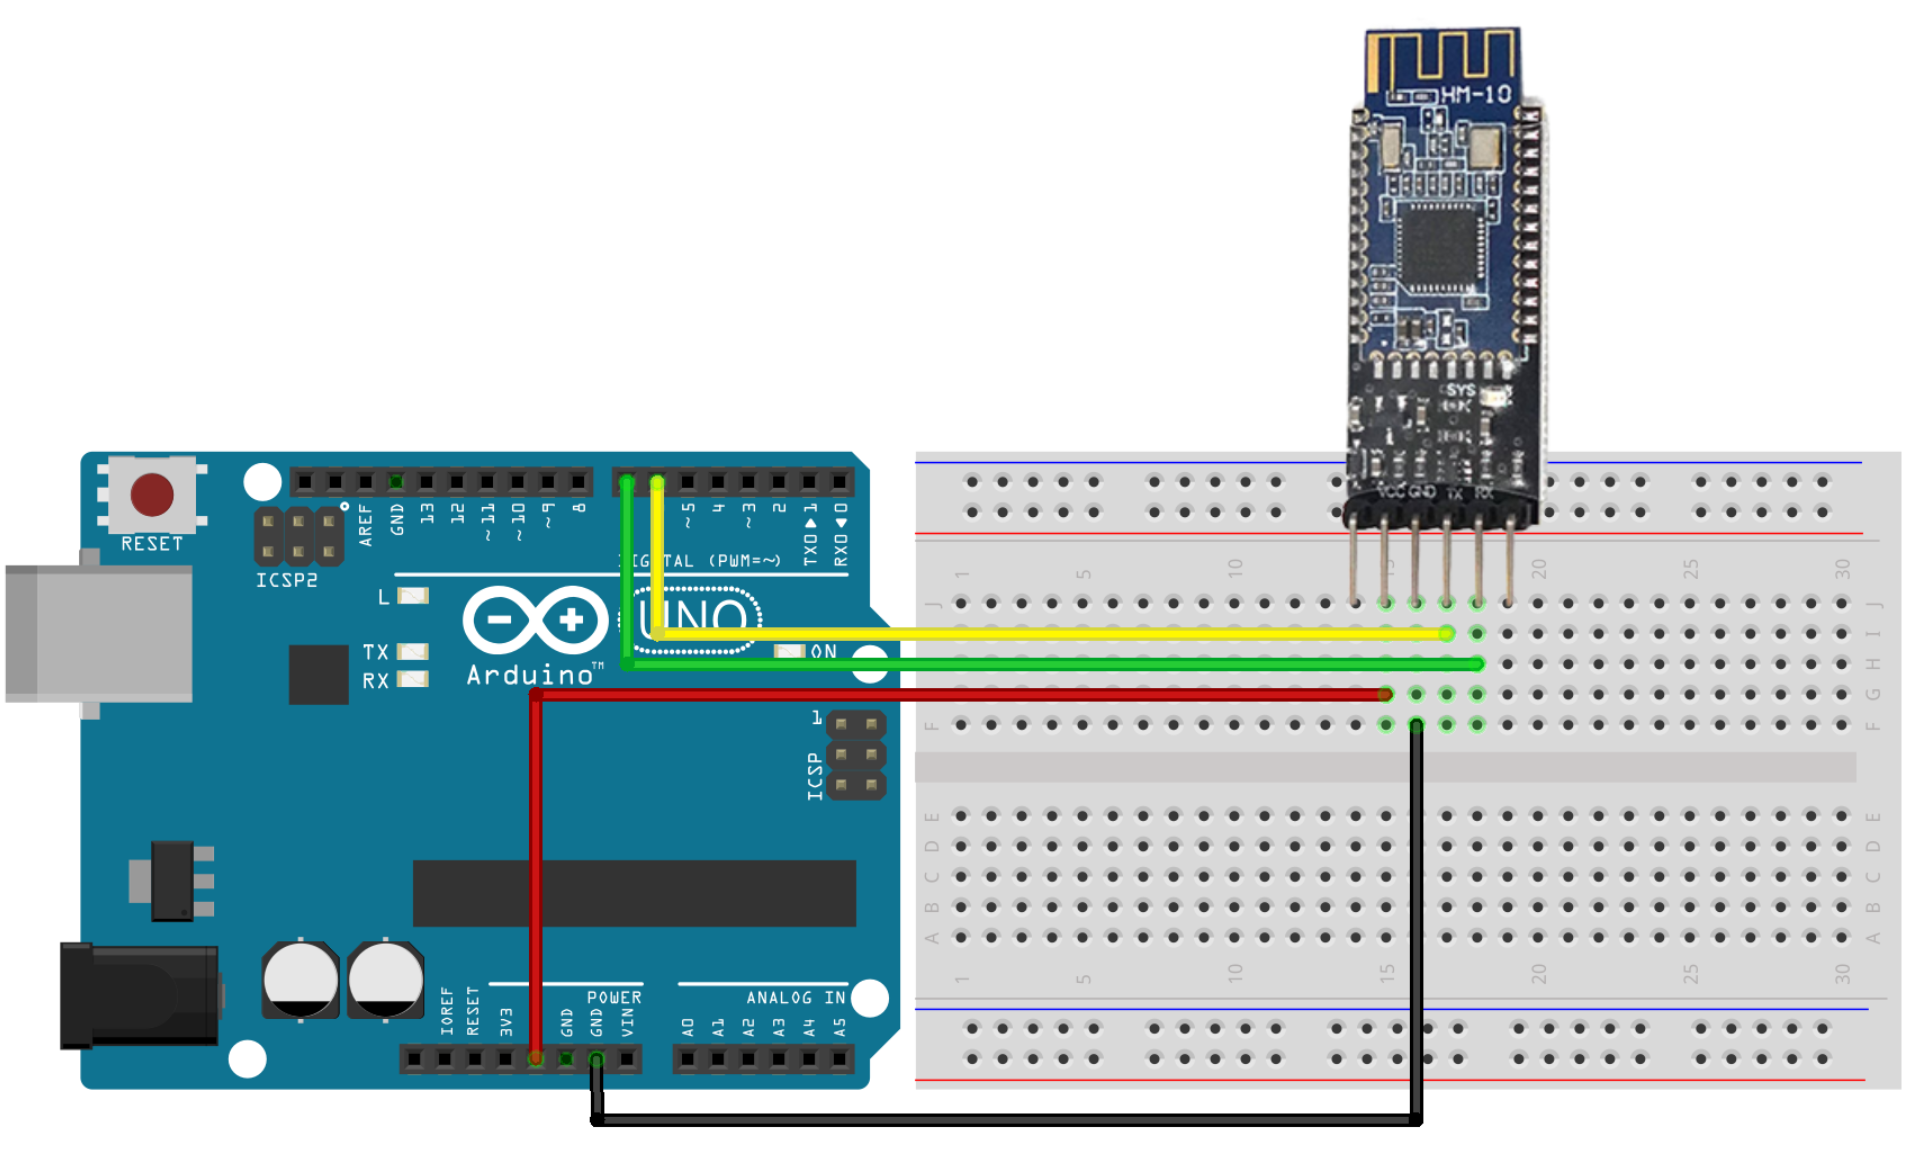
Connection
TXD and RXD can be connected to any digital pin on the UNO board as desired (in this text, D6 and D7 are used).
| HM-10 | Arduino Uno |
|---|---|
| GND | GND |
| VCC | 5V |
| TXD | D6 |
| RXD | D7 |

Library
SoftwareSerial (default library)
AT Command
- The Bluetooth status can be checked using AT commands.
- AT commands can be sent via the Serial Monitor.
- The datasheet describes the AT commands available (different from those of the HC-06 Bluetooth module). Refer to the HM-10 Datasheet.
Example Code
// Include the library for serial communication
#include <SoftwareSerial.h>

// Create a SoftwareSerial object for Bluetooth communication
SoftwareSerial BTSerial(6, 7);

void setup()
{
  // Set baud rate
  Serial.begin(9600);
  BTSerial.begin(9600);
  Serial.println("Serial communication started");
}

void loop()
{
  // If data is received from the Bluetooth serial, print it to the Serial Monitor
  while (BTSerial.available() > 0)
  {
    byte data = BTSerial.read();
    Serial.write(data);
  }

  // If data is received from the Serial Monitor, send it over Bluetooth serial
  while (Serial.available() > 0)
  {
    byte data = Serial.read();
    BTSerial.write(data);
  }
}
Operation Check
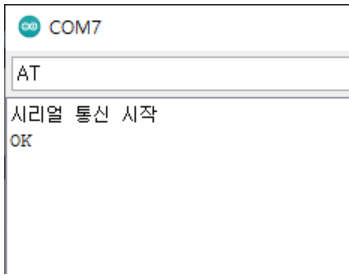
After uploading the code, enter AT in the Serial Monitor to test the operation.
If OK is displayed, the module is functioning correctly.

Bluetooth Terminal Application Test
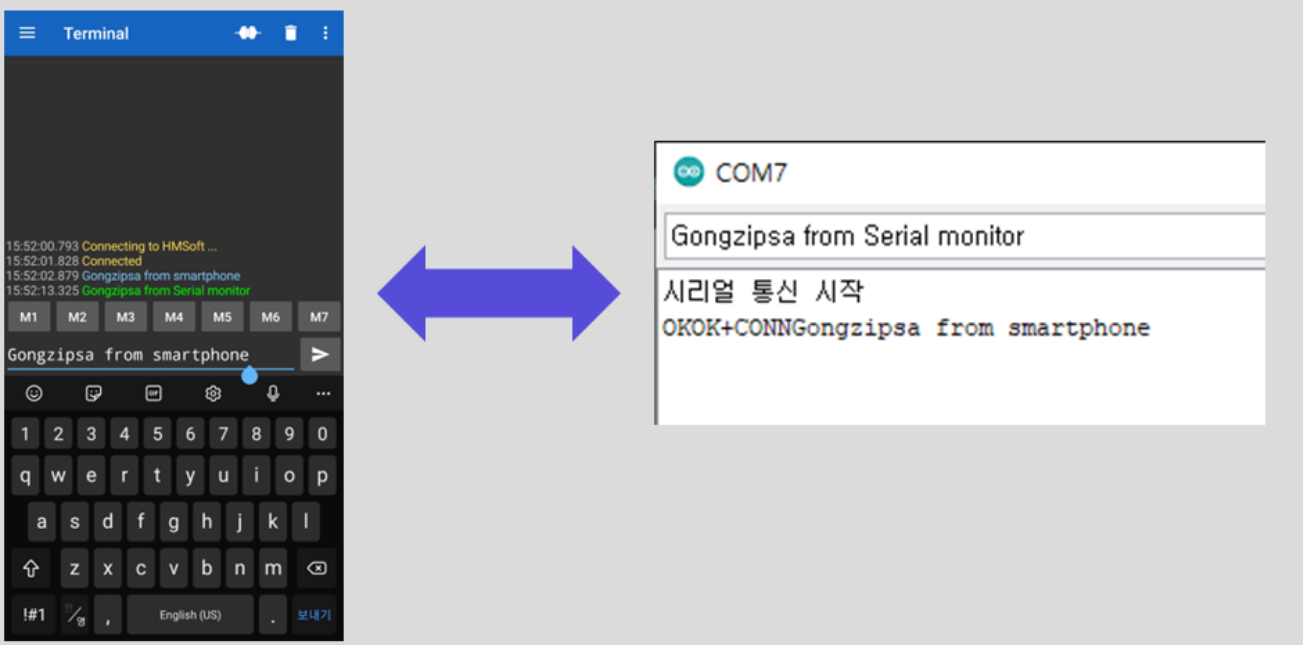
- Install a Bluetooth terminal application on your smartphone. The type of application does not matter.
- Connect to the HM-10 Bluetooth module within the application.
- Messages entered in the app will be displayed on the Serial Monitor, and vice versa, messages entered in the Serial Monitor will be displayed in the app.
